Geofences
A Geofence is a virtual boundary drawn on a map around a geographic area of significance to your fleet.
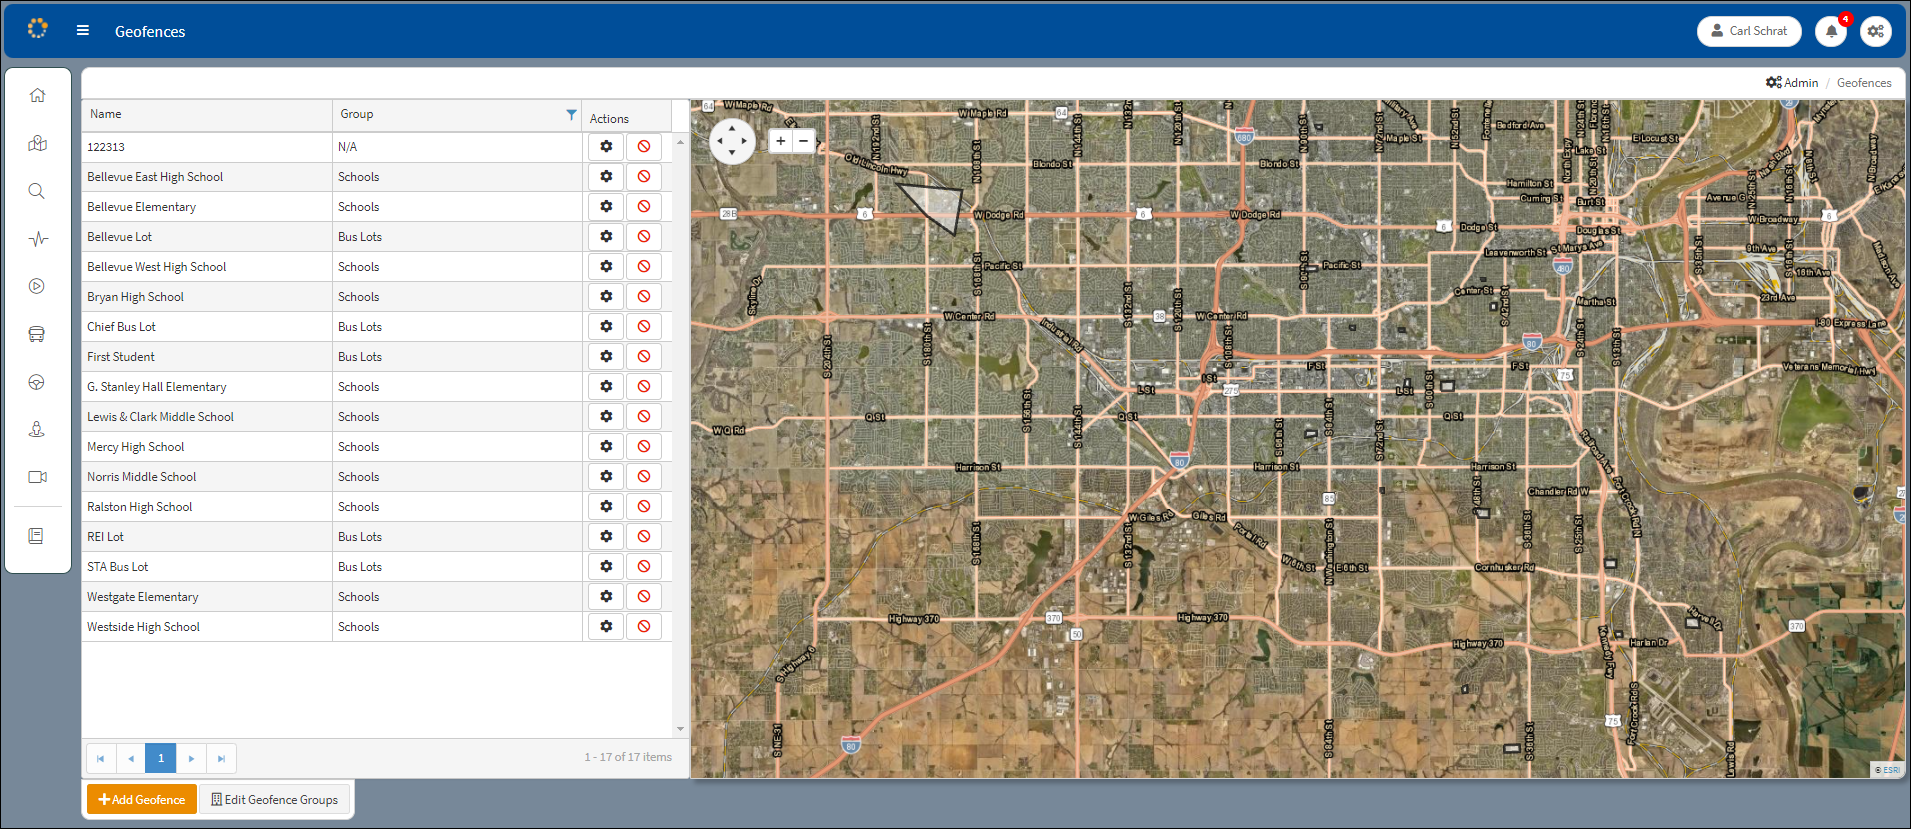
Geofence Map
Name – Column listing the geofences.
Group – Method to define and categorize the geofence by type (i.e. school district, counties, forbidden zones).
Actions – Column listing option to either edit or delete a geofence.
The Navigation tools are displayed below. Use the arrows on the Directional wheel to move on the map up and down or left to right. The view can be expanded (+) or contracted (-) using the Zoom in/out buttons.
| Directional wheel | Zoom in/out buttons |
 | |
+ Add Geofence – Click to initiate the creation of a new geofence.
Edit Geofence Groups – Create, edit, or remove Geofences and Geogroups. Used to record the entry and exit times of your vehicles.
Creating a Geofence
1.Click + Add Geofence... and the map below used to plot a new geofence opens. It is possible to search for an address by entering the address in the Find address search box in the lower left corner of the screen. After entering the address, click Search to begin the address search.
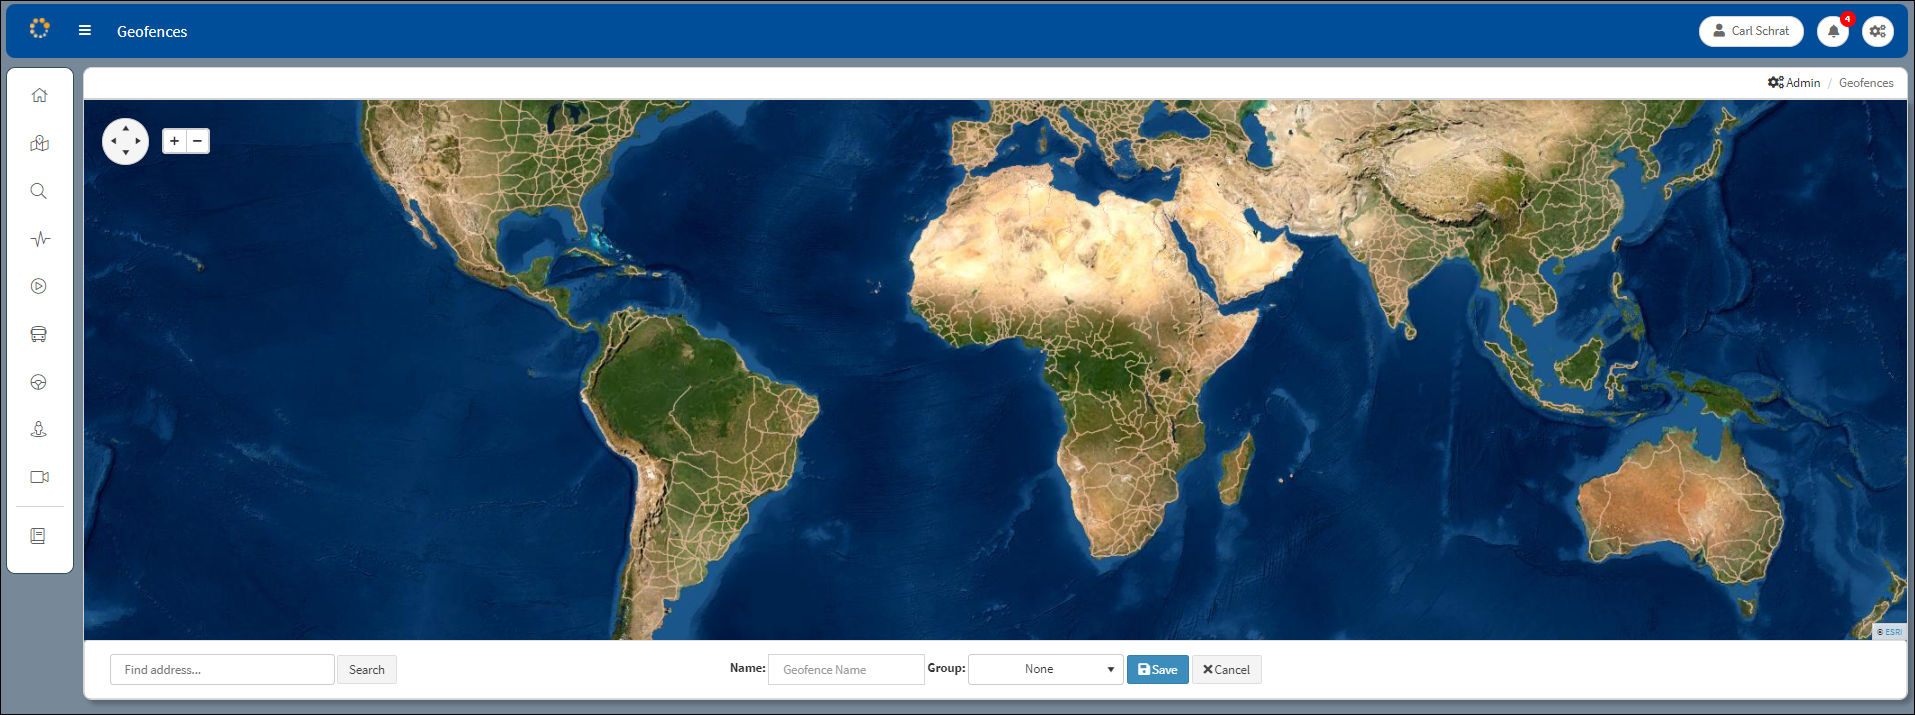
Add Geofence Map
1.Enter the new Geofence Name in the Name: cell (i.e. 50th & Grover).
2.From the Group: drop-down list select the lot that will be associated with the new geofence (i.e. Chief) and click Save. Click x Cancel to return to the initial Geofence map.
A message may appear to remind the user that the geoshape must contain four or more points. Click OK.

Geofence Shape Reminder
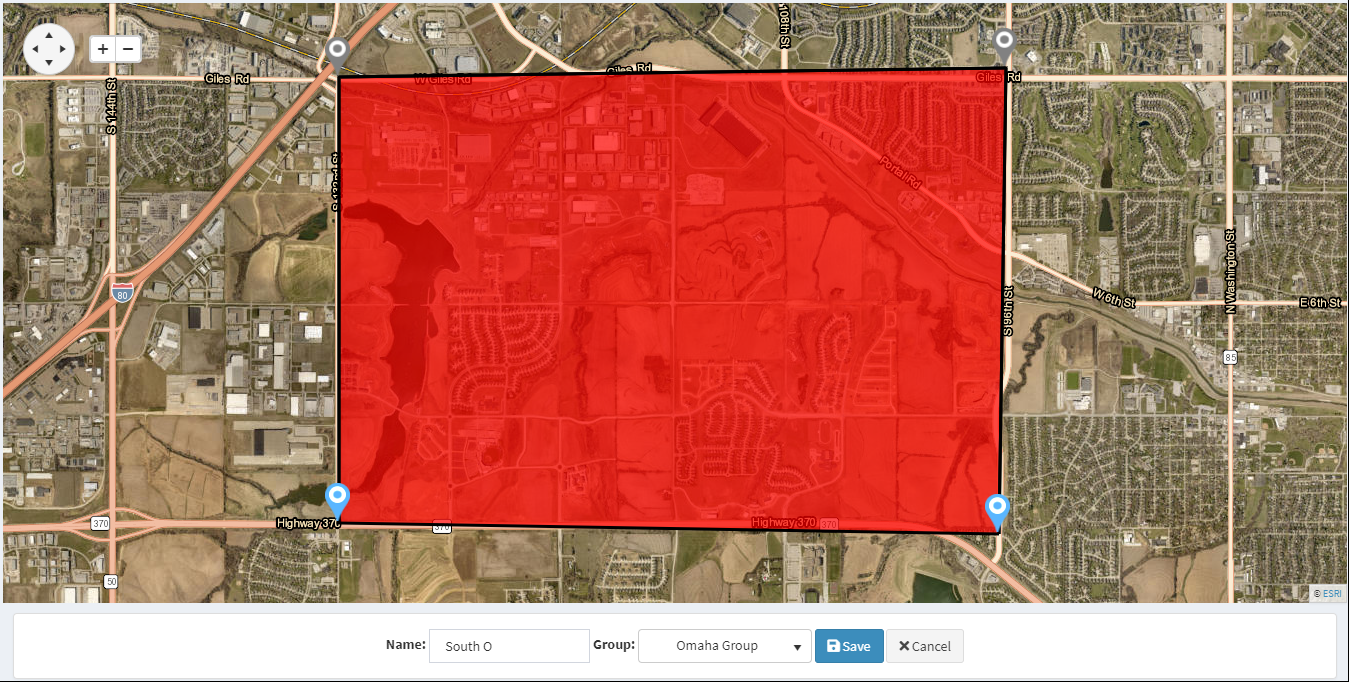
Mock Geofence
Edit Geofence Groups
Click the Edit Geofence Groups button in the upper right corner of the screen to open the Edit Geofence Groups menu. Click + Add new record to create a new group on the Edit Geofence Groups menu. The new group will appear at the bottom of the list of groups. To rename a new group, click on the new group and enter the name of the new group.
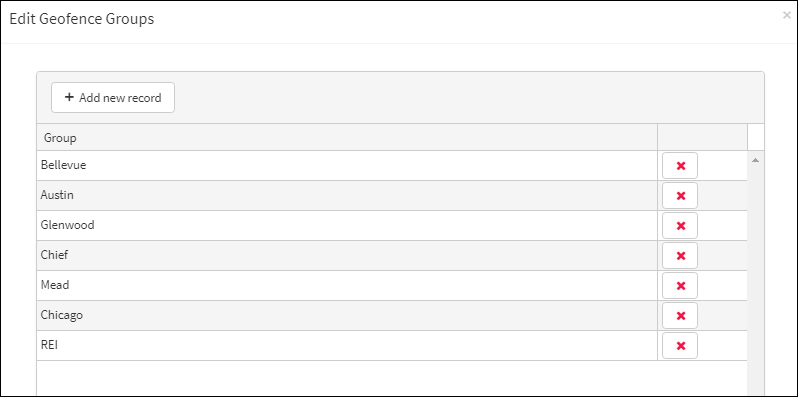
Edit Geofence Groups Menu
To delete a group from the menu, click ![]() to the far right from the Group name. Click OK to confirm deletion of the record.
to the far right from the Group name. Click OK to confirm deletion of the record.

Delete Group from Menu
Edit Geofence Parameters
1.In the Actions column to the right of the Name of the geofence, click ![]() to open the geofence and change its parameters.
to open the geofence and change its parameters.
2.Use the view and zoom icons at the upper left corner of the screen to zoom into the area you would like to designate as a lot.
3.Once you have located your area on the map, click on the boundaries to place markers![]() around the perimeter. Markers can be clicked and dragged on the map to adjust the boundaries of the geofence. If you make a mistake and need to remove a marker, right click to remove the last marker placed on the map. Repeat to remove more.
around the perimeter. Markers can be clicked and dragged on the map to adjust the boundaries of the geofence. If you make a mistake and need to remove a marker, right click to remove the last marker placed on the map. Repeat to remove more.
Note: Be sure to clean up any stray markers. Stray markers can have adverse affects on your geofence. |
It is possible to alter a geofence without losing track of the last location on the geofence. Hover over the edge of the section of the geofence and the line is highlighted in bold. Click on the highlighted line and a marker appears in the center of the line. Drag the new marker to the new location to alter the scope of the geofence. When a marker is gray ![]() it means a new marker will not connect to it. In contrast, a blue marker indicates the next marker will appear between them.
it means a new marker will not connect to it. In contrast, a blue marker indicates the next marker will appear between them.
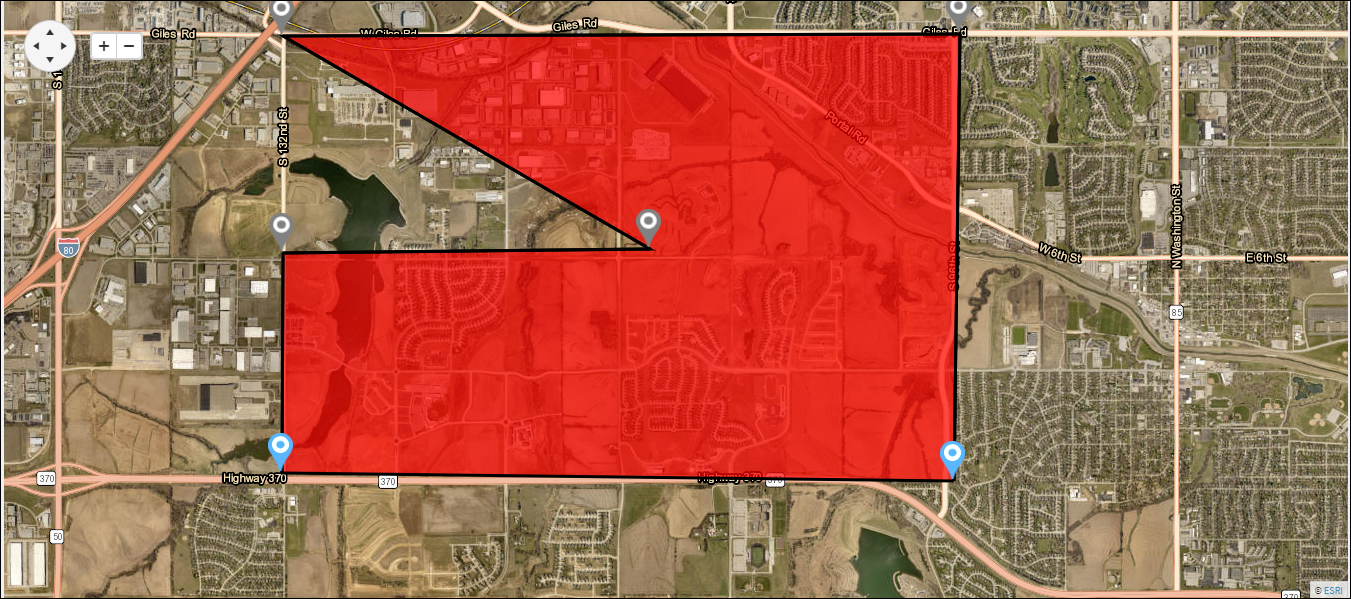
Additional Plots Allow Easier Editing
4.Click Save to the right of the Group: drop-down list.
Deleting a Geofence
Click ![]() to delete the geofence from the list of geofences. A message will appear asking whether to continue with the deletion of the geofence. Click Yes to continue or No to cancel.
to delete the geofence from the list of geofences. A message will appear asking whether to continue with the deletion of the geofence. Click Yes to continue or No to cancel.

Delete Geofence Confirmation
Warning: This geofence is associated with ARMOR Actions or StopArm Schemas. Are you sure you still want to force deletion? |
