Insight Reports

Contents
An Insight Reports search can be utilized to locate specific inputs and events for a group of vehicles or a specific driver vehicle over a multiple number of days. The functionality is similar to Insight in that it allows custom searches to suit user criteria. To access the Insight Reports functionality, click on Insight Reports from the ARMOR Navigation Menu below Insight.
From the Group: drop-down menu, select a vehicle group or all vehicles. Depending on whether all vehicles or a vehicle group is selected, will determine what vehicles will appear in the Vehicle: drop-down. If a specific vehicle group is selected in the Group: drop-down, then vehicles available in the Vehicle: drop-down will be specific to the vehicle group selected in the Group: drop-down.
Click on the Start Date and End Date calendar drop-down menus to set the dates of the search. The range of time between the Start Date and End Date is limited to a maximum of 90 days. If the 90 day limit is exceeded in the End Date box, the following warning message will appear:

Exceed 90 Day Date Range Warning
Click on the ![]() to add a selected Input, Speed, Geofences, Time, or Mobileye category for display on the right side of the window. Multiple entries from the same category is permitted. Click
to add a selected Input, Speed, Geofences, Time, or Mobileye category for display on the right side of the window. Multiple entries from the same category is permitted. Click ![]() to clear the entry from the window.
to clear the entry from the window.

Initial Insight Reports Window
Search criteria is determined by making selections in the following drop-down menus:
Inputs – Drop-down menu includes the following categories that can be part of vehicle search criteria.
Field |
Description |
|---|---|
Brakes |
The vehicle is using its brakes |
Custom 1-4 |
Custom inputs |
De-acceleration |
Vehicle de-accelerator is pressed |
Emergency Brake |
The emergency brake is applied |
Front Door |
Front door is opened |
Left Turn |
The vehicle left turn signal is active |
Lift |
A lift is activated on the vehicle (i.e. a handicap lift) |
Lift Door |
Lift gate door is opened |
Night Mode |
The stop-arm POD has been switched to night mode |
Radar |
The stop-arm POD radar detects a vehicle |
Rear Door |
Rear door is opened |
Red Warning |
Red lights on the vehicle |
Reverse |
Vehicle is in reverse |
Right Turn |
The vehicle right turn signal is active |
Stop Arm |
The stop arm is engaged |
Yellow Warning |
Yellow lights on the vehicle |
Events – Drop-down menu includes the following significant events.
Field |
Description |
|---|---|
Motion |
Motion is detected from the motion camera aboard the vehicle |
Radar Detection |
Radar detects a vehicle |
Panic |
When a panic button is pressed by the driver |
Ignition |
When the vehicle is running |
J1939 – Drop-down menu includes the following J1939 categories. Click Select Descriptors to set up vehicle events to be listed on the Search Type Report.
Note: The list of J1939 selections that appear on the table below reflect the J1939 search options made under J1939 Configurations in Administration.
Field |
Description |
|---|---|
Engine Hours |
Number of hours the engine has run |
RPM |
Engine speed measured in revolutions per minute |
Intake Air Temperature |
Temperature of the intake air entering the engine |
Battery Voltage |
Voltage level of the battery |
Fuel Level |
Amount fuel in the vehicle fuel tank |
ABS |
Automatic Braking System active |
Headway |
Distance between vehicle measured in seconds |
FCW |
Forward Collision Warning |
LDW |
Lane Departure Warning |
HWW |
Headway Warning |
SPDW |
Speed Warning |
Accel (Total) – Acceleration
Field |
Description |
|---|---|
Speed Accel (Total) |
Above the specified acceleration unit, measured in g
|
Driver Events – When the driver presses the Event button on the Driver App
Field |
Description |
|---|---|
Virtual Event Marker |
Specific event that caused the drive to press the Event button |
Speed – Boundaries or parameters of measured vehicle speed
Field |
Description |
|---|---|
Speed Above |
Above the specified speed, measured in mph |
Speed Below |
Below specified speed, measured in mph |
Acceleration |
Above the specified acceleration unit, measured in g
|
Geofences – A geographical area that encompasses the route for a specific vehicle or fleet of vehicles
Field |
Description |
|---|---|
Geofences Inside |
Events occur within the specified geofences |
Geofences Outside |
Events occur outside of the specified geofences |
Zone Search |
Enables the user to search a zone temporarily without the need to setup a geofence |

Click Zone Search to open the Geofences - Zone Search dialog box. Click Set... to open the Zone Search Map.
Click on the map to initiate the starting point![]() of the geofence zone. Expand or contract the circular radius of the geofence zone, measured in feet, by clicking and dragging the Radius bar on the bottom of the map. Click Set Location to save the zone.
of the geofence zone. Expand or contract the circular radius of the geofence zone, measured in feet, by clicking and dragging the Radius bar on the bottom of the map. Click Set Location to save the zone.

Zone Search
Use the arrows on the Directional wheel to move on the map up and down or left to right. The view can be expanded (+) or contracted (-) using the Zoom in/out buttons.
The coordinates, measured in latitude and longitude, along with the specific location of the zone, are displayed on the bottom of the map.
It is possible to enter the address of where the zone will be deployed in the Find address... text box. Click Search to pinpoint the zone location on the map.

Zone Search without a Geofence
Time – Restriction of results based on time of day and/or length of events.
Time - At Least: Only return events that are of an equal or greater length, measured in minutes and seconds.
Mobileye – The drop-down menu supporting the Mobileye Driver assistance system.
Field |
Description |
|---|---|
Speeding |
Speed Warning measured in 5 mph increments |
Headway |
Distance between vehicle measured in seconds |
Forward Collision Warning |
Warning that the vehicle exceeded the distance of the set collision threshold |
Lane Departure Warning |
Warning the vehicle is exceeded the distance of the set lane threshold |
Headway Warning |
Warning the vehicle is exceeded the set distance of another vehicle |
Ridership – Drivers and passengers search for a specified vehicle over a designated timeframe.
Driven By: Select the driver from a drop-down menu that lists the available drivers.
Students Onboard: Select from a drop-down list of the students onboard the specified vehicle subject to the timeframe of the search.
Click the Driven By field to open a drop-down menu that lists drivers individually. The driver who was operating the vehicle subject to the timeframe of the search can be identified. This search can be conducted without the need of selecting any additional fields.

Driven By Search Drop-Down
After selecting a driver from the drop-down menu, click Search. The driver search results are displayed in the same format as other searches. Click the ![]() button to clear the results.
button to clear the results.
To search for an individual student, click the Students on Board field to open a drop-down menu that the user can enter the name of an individual student to make the drop-down menu appear. When a search is conducted with the Student On Board filter activated, the search results will be the same, but it will only show events that the student (in which the user typed in previously) was on.

Student On Board Drop-Down
After selecting a student from the drop-down menu, click Search. The student search results are displayed in the same format as other searches. Click the ![]() button to clear the results.
button to clear the results.

Active Insight Reports Window
Once the search parameters have been entered, click Search to commence the Search.

Search Progress
Search Results
The search results are displayed on a split window with the left side displaying the identity of the vehicle and the date, location, and duration of the event. Use the map on the right to review the plots denoting the location of the events identified by the dots on the map. Each green dot ![]() on the map represents a vehicle event. A red dot
on the map represents a vehicle event. A red dot ![]() indicates the location of the selected vehicle event from the table.
indicates the location of the selected vehicle event from the table.

Insight Reports Search Results
The header above the map identifies the vehicle or driver and the date and time of the event.
Insight Reports Map Header
Click on the Request Video button to direct the user to the Request Video window.
Click on the Show Ridership button to display the names of the students on board the vehicle at the time of the event.

Ridership List
The Id, first name, and last name of the students on board are displayed on the list.
Click the ![]() button to clear the results.
button to clear the results.
Create a Report
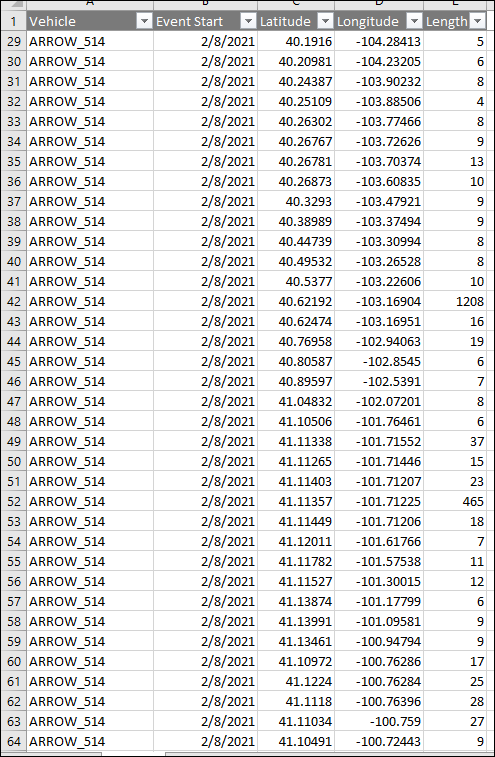
To generate a report in either PDF or Excel format, click Export PDF or Export Excel in the top of the Results tab. The results can be cleared by selecting Clear Search Results. The report will be downloaded to the downloads folder of the browser. The report contains the vehicle identity, date of the event, latitude and longitude of the event location, and the length of time for each occurrence of the Search Type as depicted on the map.
Sample Insight Search Results Report in Excel
Sample Insight Search Results Report in PDF format
When requesting a Search Report in PDF format, enter a description for the generated report in the Report Description dialog box.

Insight Report Description Dialog Box
After entering the name of the report, click OK.

Search Report Results by Vehicle

Search Report Results by Event
If the report cannot be processed, the following message appears:

Insight Report Cannot be Processed Message
Click OK and attempt to request the report later.