Vehicle Log

Contents
A specific vehicle can be selected from within the Diagnostics window by clicking in the row for the specific vehicle to open the Vehicle Log window. Using the Vehicle Log function allows the examination of issues that are applicable to a single vehicle. The Vehicle Identification number is listed at the top of the Vehicle Log. If there are no issues detected on the vehicle, only the Severity and Description columns will appear on the Vehicle Log.

Diagnostics Vehicle Log
The following information is displayed in the header of the Vehicle Log:
•Group
•FW Version
•IP Address
•DVR Series
•Voltage
•MCU Version
•Last Reported
Checklist Reports
The Checklist Reports allow users to review vehicle check history in Vehicle Logs. The checklist items are marked as critical until they are addressed. The checklist reports can be saved in Excel or PDF format.
Duplicate memo entries are consolidated to avoid repetitious memo entries. The number of duplicate memo entries is denoted in the Issue Count column associated with the entered memo. For example, if a memo is entered stating a Low temperature is detected, the description would not be repeated in the table, but added to the Issue Count as a second occurrence of the issue as shown in the second to last row on the Vehicle Log sample above.
A specific vehicle can be selected from within the Diagnostics window by clicking in the row for the specific vehicle to open the Vehicle Log window to access the Checklist Reports ![]() button.
button.
The Checklist Reports are displayed on the following table. The reports are categorized in three levels of severity:
•Informational ![]()
•Warning ![]()
•Severe ![]()

Checklist Reports
Checklist – A brief definition of the issue.
Completed – The date and time when the specified event was last recognized.
Miles – The mileage of the vehicle at the time the checklist item occurred.
Driver – The driver of the vehicle during the date and time of the checklist item.
From the Checklist Report table, select a report.

Individual Checklist Report
The Checklist Report displays the vehicle section, checklist item, and any relevant comments.
Driver Checklists and Vehicle Inspection information can be categorized by severity and exported in Excel and PDF format.
Advanced drop-down
Click on the Advanced button to access a drop-down menu that displays the Vehicle Log Function buttons.
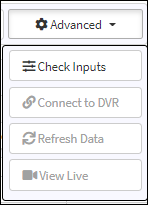
Vehicle Log Function buttons
•Check Inputs – Provides a quick reference of how recent each input has been reported.
•Connect to DVR – Opens the DVR web page.
•Refresh Data – Pulls data from DVR to server.
•View Live – Opens DVR web page to live view page (HD5 only)
Note: The Vehicle Log Functions are described further in this section.
Connect to DVR
Select Connect to DVR from the Advanced drop-down menu to initiate a web connection. For HD5 the MDVR Login window will appear.
Authentication is required prior to any further access. Enter your User Name and/or Password and click Login. Note: HD5 requires a password only.
")
MDVR Login Window (HD5)
")
Log in Window (non-HD5)
Refresh Data
Click the Refresh Data button in the Advanced drop-down menu to pull new data from the DVR to the server.
Add Memo
Enter any additional information about the vehicle log description in the Add Vehicle Memo dialog box. The category of the memo can be defined on the drop-down at the end of the memo box. The memo can be defined as Informational, Warning, or Severe. Click Submit when complete. Click Cancel to stop and return to the Vehicle Log.

Add Vehicle Memo
The Vehicle Log report can be exported in PDF or Excel format by clicking the appropriate button on the Vehicle Log window.
Full Vehicle Log
Provides a listing of events for a selected vehicle over a designated period of time.
Click the Full Vehicle Log button to open the following window to allow a more comprehensive listing of vehicle issues attributed to a selected vehicle or a group of vehicles. Refer to the Search section for information about conducting search queries on the Full Vehicle Log window. Click "Diagnostics" next to the check box in the upper right corner of the window to return to the Vehicle Log.

Full Vehicle Log
A message indicating a vehicle has reported to the server for the first time, with the date and time it first reported, is listed on the Full Vehicle Log table.
New Vehicle Reporting to Server Identified
Check Inputs
Click the Check Inputs button to monitor the amount of time since an input occurred involving each listed input. The amount of time that has passed since the inputs was reported. The inputs are color keyed based on the colors of the Healthy (Green), Warning (Orange), and Severe (Red) values defined on the Summary Boxes.

Check Input Activity
The array of inputs displayed on the Input Activity window is determined by settings made in Administration/Groups/Manage Input Schemas.
Vehicle Log Table Fields
Severity – Level of magnitude the event or issue projects. Three different measures of severity can be assessed to the event: Informational, Warning, or Severe.
Description – A brief definition of the issue (i.e., Low voltage detected).
Last Occurrence – The date and time when the specified event was last recognized.
Issue Count – Number of times the occurrence of the event was recognized over the number of days set in the Time Frame drop-down.
Dismiss – Click ![]() to clear the event/issue from the table.
to clear the event/issue from the table.