Vehicle Groups
The Groups section under Administration is where Groups are created and managed. It is also where you create, manage, and assign Input Schemas to those Groups.
Groups can be used to separate parts of a fleet by type of vehicle, geographic area, storage location, installation type, etc. This can allow for more control and greater visibility of a fleet.

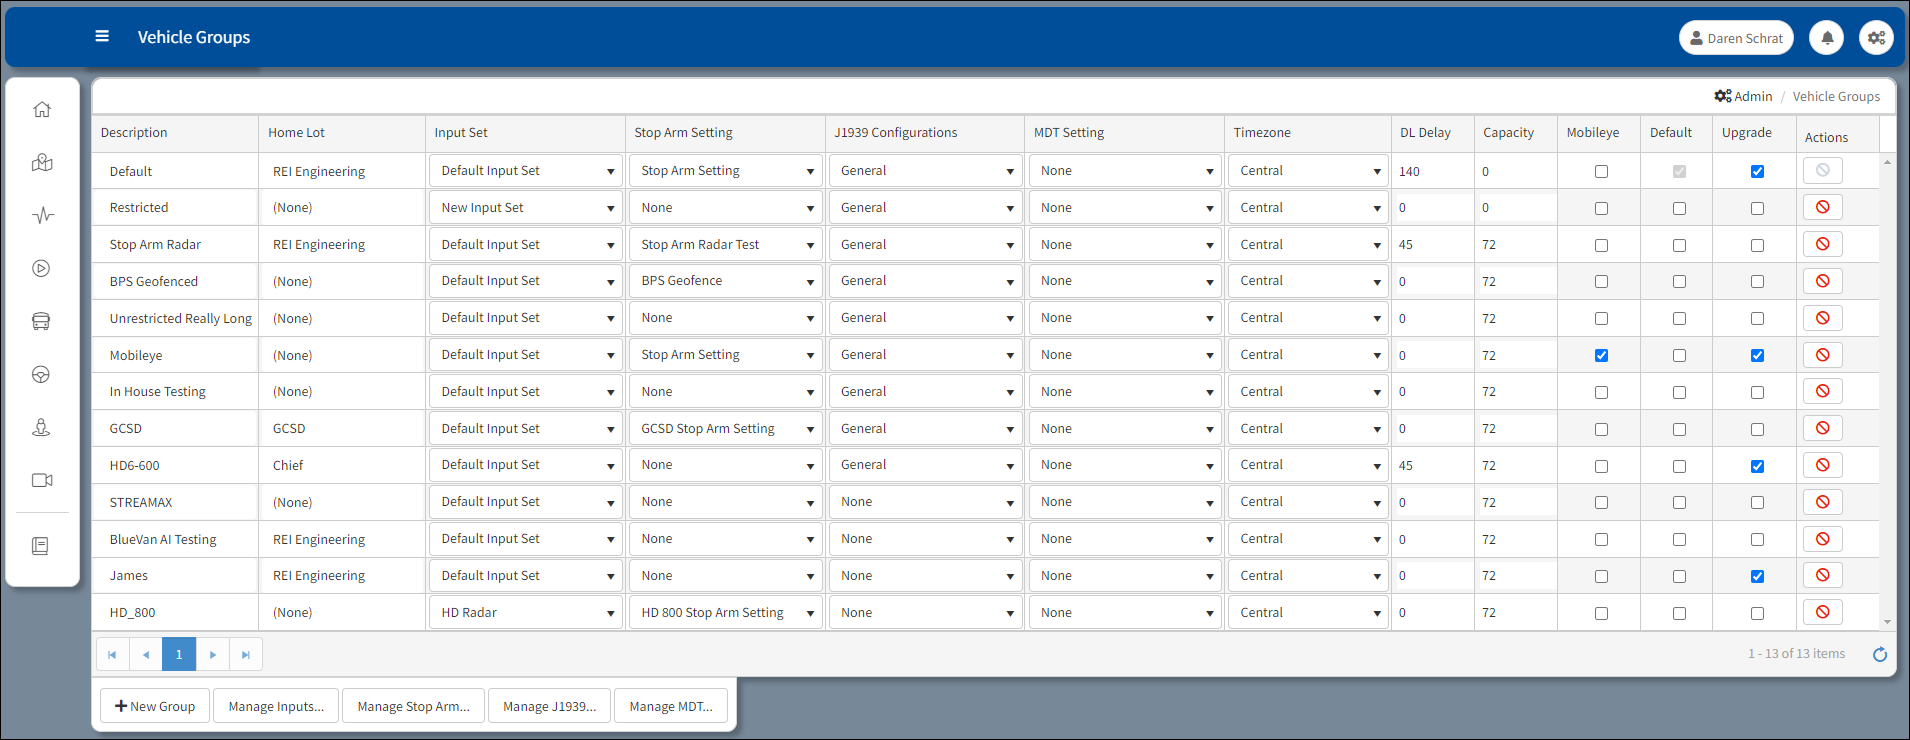
Vehicle Groups Window
The fields included in each column of data for a Group:
•Description – Type a name or description for your group.
•Home Lot – Click in the selected Home Lot cell to access the Add Lot to Vehicle Group dialog box.
•Input Set – The assigned configuration of the inputs.
•Stop Arm Setting – The assigned configuration of the inputs from the stop-arm assembly.
•J1939 Configurations – The assigned J1939 configuration. Applicable to HD5 only.
•MDT Setting – The assigned configuration of the MDT settings.
•Timezone – Set the local vehicle timezone.
•DL Delay – The number of minutes the system is active after the ignition is turned off.
•Capacity – The number of passengers allowed on the vehicle. The default number is 72.
•Mobileye – Check box to include Mobileye J1939 information in addition to existing J1939 information.
•Default – Check box to select a specific group as the primary group for a new vehicle.
•Upgrade – Check box selected to enable the firmware supporting the DVRs for the group to be updated.
•Actions – User can select the delete button![]() to remove the group. The default group cannot be removed.
to remove the group. The default group cannot be removed.
Adding a Lot to a Vehicle Group
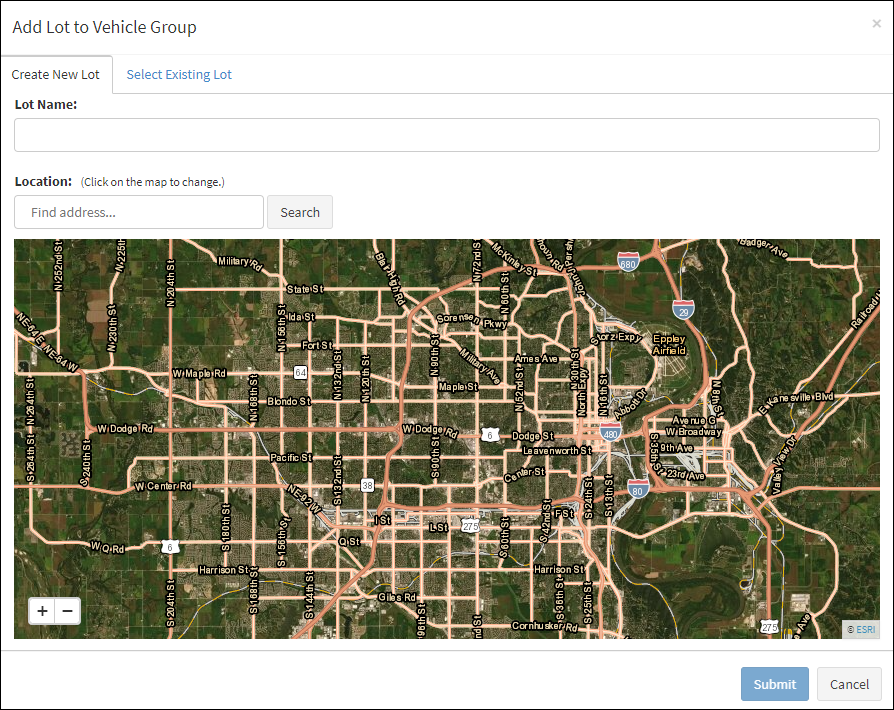
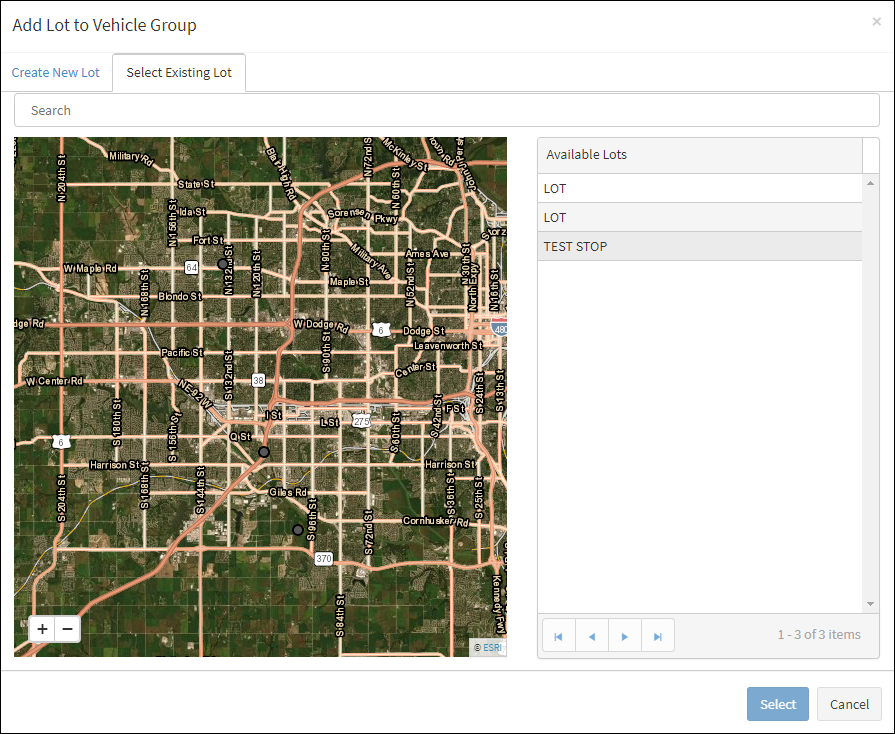
From the Add Lot to Vehicle Group dialog box, the user assigns the lot from where the vehicle running the Auto selected route is generated from. The lot can be created with the user assigning the new lot its name and designating the address from the Create New Lot tab. From the Select Existing Lot tab, the user can select from a list of available lots.
 Create New Lot Tab |

Select Existing Lot Tab
After creating the new lot click Submit. Click Select after selecting from the list of available lots.
Group Management Buttons:
+New Group – Click to create an additional group to the list of vehicle groups on the Administration Group listing.
Manage Inputs – Refer to Input Sets
Manage Stop Arm – Refer to Stop Arm Settings
Manage J1939 – Refer to J1939 Configurations
Manage MDT – Click to create MDT Setting Configurations
Add a New Group
1.Click +New Group. The new group will appear at the bottom of the list. It will be highlighted and ready to edit any of the default settings.
Group Management Buttons
2.Follow the Edit a Group instructions to change the default settings.
Edit a Group
1.Click the row within the group you want to edit. It will now be highlighted (if you just created the group, it will already be highlighted).
2.To edit the name of the group, click the name and type in the new name.
3.To edit attached lot, input set, stop arm configuration, or timezone: click that field and select from the drop-down list of choices.
4.To edit the off delay setting, click the field and type in the number of minutes to delay DVR shutoff.
Remove a Group
1.Click Delete![]() to the far right of the group under the Actions column to remove the group.
to the far right of the group under the Actions column to remove the group.
2.There will be a prompt to confirm that the group is selected for deletion.

3.Click OK to delete it.
Manage MDT
Click the Manage MDT button from the Group Management buttons to open the MDT Configurations window.
Click the +Add MDT Configuration ![]() button to add a new setting configuration to the MDT Configuration table.
button to add a new setting configuration to the MDT Configuration table.

MDT Configuration Window
The screen consists of the following fields:
Description – Where the MDT Configurations are identified and listed.
Actions – Where the user can either edit or delete a MDT Configuration by clicking on the Edit or Delete icons.
![]() Edit – Click to open an Edit Configuration window for a specific MDT Configuration. The user can select and edit Descriptor values from a drop-down list for a specific MDT Configuration description.
Edit – Click to open an Edit Configuration window for a specific MDT Configuration. The user can select and edit Descriptor values from a drop-down list for a specific MDT Configuration description.

Edit Configuration Window
Description: New Setting Configuration is the default description. Enter a name
Screen Status While Driving: A drop-down menu that users can select Do Nothing or Hide Screen.
![]() Duplicate – Adds a new setting configuration to the table that is the same as the one selected to be duplicated.
Duplicate – Adds a new setting configuration to the table that is the same as the one selected to be duplicated.
![]() Delete – Click to clear the selected MDT Configuration from the list. A confirmation message will appear asking to confirm the deletion. Click Yes to continue. Click No to cancel.
Delete – Click to clear the selected MDT Configuration from the list. A confirmation message will appear asking to confirm the deletion. Click Yes to continue. Click No to cancel.

Delete Setting Confirmation Message
