Advanced Settings

Contents
An administration-only page where the protocol settings can be preferably changed by advanced users. The default values are the REI-recommended settings and administrators are encouraged to consult with REI before making any changes.

Advanced Settings On-Premise Install View
")
Advanced Settings Multi-tenant View (HD5 only)
")
Advanced Settings Multi-tenant View (HD6 only)
ARMOR Dialog Box
Temporary Link URL: Can be used to access ARMOR when the hosting domain is not yet available.
System Timezone: Timezone applicable to the system output.
SAV File Path: Proprietary use only.
SFTP Destination: Proprietary use only.
SFTP User & Password: Proprietary use only.
Use JSON formatting for evidence file: Proprietary use only.
Max Repository Size: Maximum size of the repository. This amount of space should be available on the disk.
Max Database Size: Maximum size of the database.
Whitelist: Click the Edit IPs button to open the table listing the Whitelisted IP addresses.

Whitelisted IPs
Click the Add IP button to add another IP address to the table. Enter a Description and a valid IP for the IP Range. Click OK.

Adding a Whitelisted IP
Click the Delete button![]() in the Actions column to delete an IP address from the table.
in the Actions column to delete an IP address from the table.
Enable nightly maintenance (Multi-tenant only): Start/end time for database maintenance. When checked, ARMOR will likely be slow or unavailable during this time.
Allow Trusted Devices: Click this check box to set the maximum number of days devices can be in allowed in trusted status. Use the arrow keys to set the specific number of days.
REI Technical Support Access (Multi-tenant HD5 only): When set to Always Allow, REI Technical support is available.
Restrict Video Storage: Click this check box to set the number of days a stored video is available. Use the arrow keys to set the number of days before the video is deleted.
Help Improve ARMOR by sending usage data: When checked, Global off switch for sending anon usage to REI.
Display video buffering information on Live view: When checked, details of the cause for buffering are displayed while the live video is in a buffering state.
Click Save after making selections.
DVRs Dialog Box
Update Interval: Amount of time set between HD5 and HD data updates.
Default Port: The initial HTTP ports used for Active and Roaming upon installation.
Discovery Interval: For HD5 DVRs only. The number of seconds from when the DVR is in a dormant state to when the DVR retrieves updates. Range is 1-120 seconds. Default is set to 30 seconds.
Minimum Priority for Cellular Upload: For HD6 DVRs only. The DVR ignores video priority that is below the priority setting.
Priority setting choices from the drop-down: None, Urgent Only, Very High, High, Normal, Low (All)
All packets indicate Active vehicles: If checked, there is no ‘Roaming’ state. An active vehicle will allow download metadata, video, and live view.
Allow video downloads while Roaming: For advanced configuration setup. Check this box to enable cellular customers who choose to download video while roaming. Contact REI for assistance with the configuration of this service.
Auto-accept new vehicles (for On-Premise Install only): Checked: Gets moved to ‘Dormant’ and will count against total. Not checked: Gets moved to Pending and requires an administrator to accept it.
Click Save after making selections.
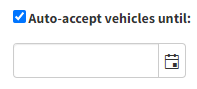
Auto-accept new vehicles until (for On-Premise Install only): Allows a date to be selected for the auto accepting of vehicles to expire. Click on the check box to open a calendar drop-down to select the expiration date.
Integrations
Select from four buttons to access the SMTP Settings, Twilio Credentials, HERE Maps Credentials, and Open API Keys.
SMTP Settings

SMTP Settings Dialog Box
SMTP Server: Name of the Simple Mail Transfer Protocol (SMTP) Server.
SMTP Port: Port used to connect SMTP Server with the Sentry Server.
Username: Name of user.
Password: Password used to access server.
From Email: Email address used to by user.
From Name: Identity of user.
To Email: Email address user sends to.
Test Email: Click this button ![]() to test if the Email address entered is valid.
to test if the Email address entered is valid.
Click Submit after completing the entries.
Twilio Credentials
A Twilio account is necessary in order to obtain the credentials needed for SMS text messaging capability.

Twilio Credentials Dialog Box
Account SID: Twilio account identification number entered to allow SMS text messaging capability.
Auth Token: Authorization credential token entered with the Twilio Account SID to authorize the Twilio account.
Click Submit after completing the entries.
HERE Maps Credentials
Enter the credentials for the HERE mapping and location data service.

HERE Maps Credentials Dialog Box
App ID: HERE application account identification number.
App Code: HERE application code.
App Key: HERE Maps API key.
Click Submit after completing the entries.
Open API Keys
A listing of Bearer tokens to be used to access the ARMOR API.

Open API Keys Dialog Box

Adding an API Key
Description: Name identifying the key (i.e., OPEN API Key for Company A).
Key: A Key can only be seen when first created. It cannot be viewed once the 'OK' button has been clicked. The Key identifier (i.e., G1ZIHC60UU1GV2FF5X2C) should be saved to a secured place prior to saving (i.e., a password management tool). A key cannot be retrieved once the name of the key in the Key column becomes (Key Hidden).
Click the Add Key to add another key to the list. Click OK when finished.
Note: A maximum number of 10 keys can be created. If additional keys are needed, an existing key must be deleted. For more information about Open API Keys, enter the following: your host name:9010/swagger in the entry box above the browser to access the REI.VendorApi page.

REI.VendorApi Page
DVR Provisions
Displays a list of current provisions. Allows for adding new provisions.

DVR Provisions Dialog Box

Enter User Name and Passkey
The User Name and Passkey can have a random set of up to 7 characters. If adding fails, a warning displays instructing the user to change the username/password combination or to try again later.
Click the Add Key button and enter a User Name and Passkey. Click Delete to clear the canceled entry.
User Name: The name given for the user (i.e.,billy)
Passkey: Used as a password (i.e.,12345)
Click the Add Key to add another key to the list. Click OK when finished.
It is recommended to write down the user name and passkey because they cannot be viewed once the OK button has been clicked.
DVR Connection Data
Click on the DVR Connection Data button to open the DVR Connection Data dialog box.
The following attributes are displayed:
•Vehicle VHost
•RabbitMQ Hostname
•File Transfer Hostname
•Rtmp Address
Single-tenant View
When the fields are edited, the edits only apply to the logged-in tenant.

DVR Connection Data Single Tenant View
Multi-tenant Live View
When the Vehicle VHost and RabbitMQ Hostname text boxes are gray, it indicates changes to these settings are not allowed.

DVR Connection Data Dialog Box On-Premise Install View
Edits to the File Transfer Hostname and Rtmp Address fields are allowed.
Click Submit after making the edits. Click Cancel to stop.
Multi-tenant Change All Settings
Changes to all the fields across all tenants can be made if the user has administrator privileges to change all four fields.

DVR Connection Data Change for All Tenants
After making the edits, click the Submit All Tenants button, A confirmation message appears to verify the changes will affect all tenants and the changes cannot be undone.

Save DVR Connection Data Message
Click Yes to proceed with saving the edits and continue. Click No to stop.
SSO Settings
Use Single Sign-On (SSO) to enable the use of one log-in credential to access multiple applications. Note: SSO applies to ARMOR Cloud applications only.

SSO Settings Dialog box
SSO Issuer: The unique identifier provided by the Identity Provider (e.g., Okta, Azure AD, OneLogin).
SSO Public Certificate: The X.509 certificate provided by the Identity Provider used to verify authentication requests.
SSO Email Domains: Restricts the SSO login to specific email domains.
Setting up Single Sign-On (SSO) on ARMOR
Enter the SSO Issuer by copying the SSO issuer value from the Identity Provider configuration and paste it in the SSO Issuer text box.
Copy the entire SSO Public Certificate including the Begin certificate and End certificate lines, from the Identity Provider and paste it into the SSO Public Certificate text box.
Enter the selected domain (e.g., company name.com) in the SSO Email Domains text box. Click the Add Domain button. Repeat this procedure for each domain required.
Click Submit to save the SSO configuration. Click Cancel to quit the set up process.
Test the SSO Configuration
Log out of ARMOR.
Attempt to log in using the Identity Provider SSO option.
Confirm the authentication is successful for all configured domains.
Note: If the log in fails, confirm the SSO issuer, certificate formatting, and the domain have been correctly added.