Sorting and Filtering

Contents
ARMOR Software Suite presents most data in a table view that incorporates a number of powerful data-sorting and filtering tools. These tools allow users to easily locate and view data of interest, regardless of the volume of the entire data pool.
Clicking any sortable column header will sort the entire list by the values in that column. Multiple clicks will toggle between sorting in ascending order, descending order, and unsorted.
Clicking the filter control ![]() in each column header brings up the filter dialog box for that column.
in each column header brings up the filter dialog box for that column.
Selecting any value or values in the filter control will display events with those values. More specific filtering controls can be obtained by combining selected values with the commands available in the sample filter controls below.
Value Filtering
Click the ![]() icon in the data column to open the applicable value filtering drop-down list. After making the selections click Filter to compile results. This type of filter is used to sort many of the ARMOR data columns across various widgets, such as Last Reported Filtering, Time Filtering, or Event Time Filtering for a closer review of a specific event or to examine a more narrow category of driver behavior details.
icon in the data column to open the applicable value filtering drop-down list. After making the selections click Filter to compile results. This type of filter is used to sort many of the ARMOR data columns across various widgets, such as Last Reported Filtering, Time Filtering, or Event Time Filtering for a closer review of a specific event or to examine a more narrow category of driver behavior details.
Examples of Value Filters:
Time Filtering and Event Time Filtering
The Time Filtering and Event Time filter are very similar. Use these filtering tools for a closer review of a specific event or to examine a more narrow category of driver behavior details.
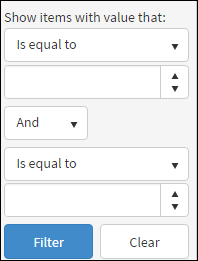
Time Filtering Drop-Down
Show items with value that: – A drop-down list where a set of values is selected to make a comparison between a set of user-determined ranges.
•Is equal to
•Is not equal to
•Starts with
•Contains
•Does not contain
•Ends with
•Is null
•Is not null
•Is empty
•Is not empty
Click Filter to execute selections. Click Clear to reset to make new selections.
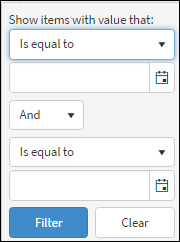
Time Filtering and Event Time Filtering calendar
Click the icon ![]() to open a drop-down calendar used to set the date range.
to open a drop-down calendar used to set the date range.
Make a selection in the And/Or drop-down list.
Click Filter to execute selections. Click Clear to reset to make new selections.
.
Event Time Filtering Drop-Down List
Make a selection in the And/Or drop-down list.
Click Filter to execute selections. Click Clear to reset to make new selections.
Duration Filtering and Priority Filtering
Used to filter video duration measured in seconds. The drop-down list allows video duration to be measured in the following values: (of exactly, greater than, or less than) against a user-determined time frame.
Click the ![]() icon in the Duration column to open the filtering drop-down list.
icon in the Duration column to open the filtering drop-down list.
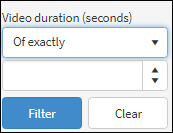
Duration Filter Drop-Down List
Click the ![]() icon in the Priority column to open the filtering drop-down list. After making the selections click Filter to compile results.
icon in the Priority column to open the filtering drop-down list. After making the selections click Filter to compile results.
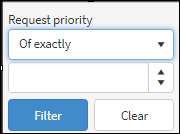
Priority Filter Drop-Down List
Check Box Filtering
Click the ![]() icon in the data column to open the applicable check box filtering drop-down list. After making the selections click Filter to compile results.
icon in the data column to open the applicable check box filtering drop-down list. After making the selections click Filter to compile results.
Use the check box filter to select a specific vehicle, driver or groups of vehicles and drivers from a list by selecting the check boxes next to each item on the filtering drop-down list. It is also possible to enter the name of the specific individual subject, or group of subjects, in the Search box at the top of the filtering drop-down list to locate a specific entry from the filter drop-down. There are different arrays of information in a check box filter, but all function the same.
Examples of Check Box Filters:
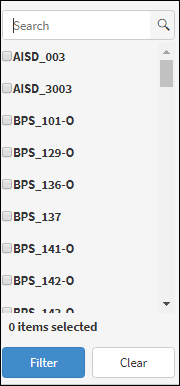
Vehicle/Vehicle Name Filter
Use Vehicle Filtering to select a specific vehicle/vehicle name or multiple vehicles by selecting the check boxes next to each vehicle. It is also possible to enter the name of the vehicle in the Search box at the top of the filtering drop-down list to locate a specific vehicle. Selecting a unique array of vehicles or an individual vehicle enables streamlined monitoring of vehicle details and driver behavior involving a select number of vehicles or for an individual vehicle.
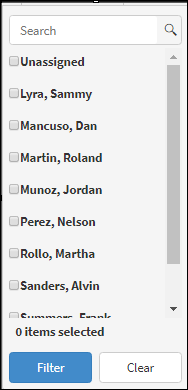
Driver Filtering
Use Driver Filtering to select a specific driver or multiple drivers by selecting the check boxes next to each driver's name. It is also possible to enter the name of the driver in the Search box at the top of the filtering drop-down list to locate a specific driver. Selecting a unique array of drivers or an individual driver enables streamlined monitoring of driver behavior involving a select number of drivers or for an individual driver.
Click the ![]() icon in the Driver column to open the filtering drop-down list. After making the selections click Filter to compile results.
icon in the Driver column to open the filtering drop-down list. After making the selections click Filter to compile results.
Group Filtering
Use Group Filtering to select a specific group or multiple groups by selecting the check boxes next to the name of each group. It is also possible to enter the name of the group in the Search box at the top of the filtering drop-down list to locate a specific group. Selecting a unique array of groups or an individual group enables streamlined monitoring of group behavior involving a select number of groups or for an individual group.
Click the ![]() icon in the Group column to open the filtering drop-down list. After making the selections click Filter to compile results.
icon in the Group column to open the filtering drop-down list. After making the selections click Filter to compile results.

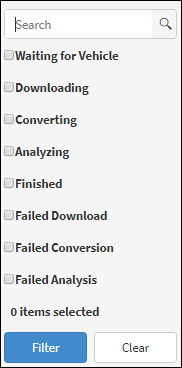
Status Filtering
Used to filter the status or the progress of the downloading of a video.
Click the ![]() icon in the Status column to open the filtering drop-down list to select a status filtering value.
icon in the Status column to open the filtering drop-down list to select a status filtering value.
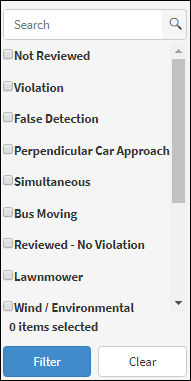
Review Step Filtering
Used to filter the custom steps used for managing the process of reviewing possible violations.
Click the ![]() icon in the Review Step column to open the filtering drop-down list.
icon in the Review Step column to open the filtering drop-down list.
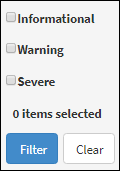
Severity Filter
Use Severity Filtering to select any of three levels of severity against an individual group, all groups, one specific vehicle, or all vehicles by selecting the check boxes next to each severity level.
Click the ![]() icon in the Severity column to open the filtering drop-down list. After making the selections click Filter to compile results.
icon in the Severity column to open the filtering drop-down list. After making the selections click Filter to compile results.
Items per page Counter
Use the arrow buttons on the tool bar in the lower left corner to page through the table. The number of items displayed on each page can be adjusted using the items per page drop-down list as shown below. The number of items per page can be set to 20, 50 and 100. The default setting is 20 items per page.
Items per page tool bar