Stop Arm Settings
A StopArm Setting is the input configuration for your stop arm hardware to the DVR.

Stop Arm Settings Initial Window
Create a New StopArm Setting
1.Click +New Setting and the Stop Arm Settings Details dialog box will open.

Stop Arm Settings List
Description – Where the Stop Arm Settings are listed.
Actions – Identified by the following icons:
![]() Setup – Click to open the Stop Arm Setting Details window for a specific stop arm setting. From the settings window the user can select Detection and Advanced values for the selected stop arm schema.
Setup – Click to open the Stop Arm Setting Details window for a specific stop arm setting. From the settings window the user can select Detection and Advanced values for the selected stop arm schema.
![]() Copy – Opens a new Stop Arm Setting Details window to add a copy of the setting to the table.
Copy – Opens a new Stop Arm Setting Details window to add a copy of the setting to the table.
![]() Delete – Click to clear the selected stop arm schema from the schema list.
Delete – Click to clear the selected stop arm schema from the schema list.
2.Click +New Setting to open the Stop Arm Settings Details window to create a new Stop Arm Setting. Enter the name of the new Stop Arm Setting in the Description field on the Detection window.
3.To access an existing setting, click the Setup icon, under the Actions column in the row of the selected setting, to open the Stop Arm Settings window for the selected Stop Arm Setting listed under the Description column. Selecting any of the seven drop down controls will allow the user to assign any available video feed that core camera function, as described below.

Stop Arm Setting Details Dialog Box
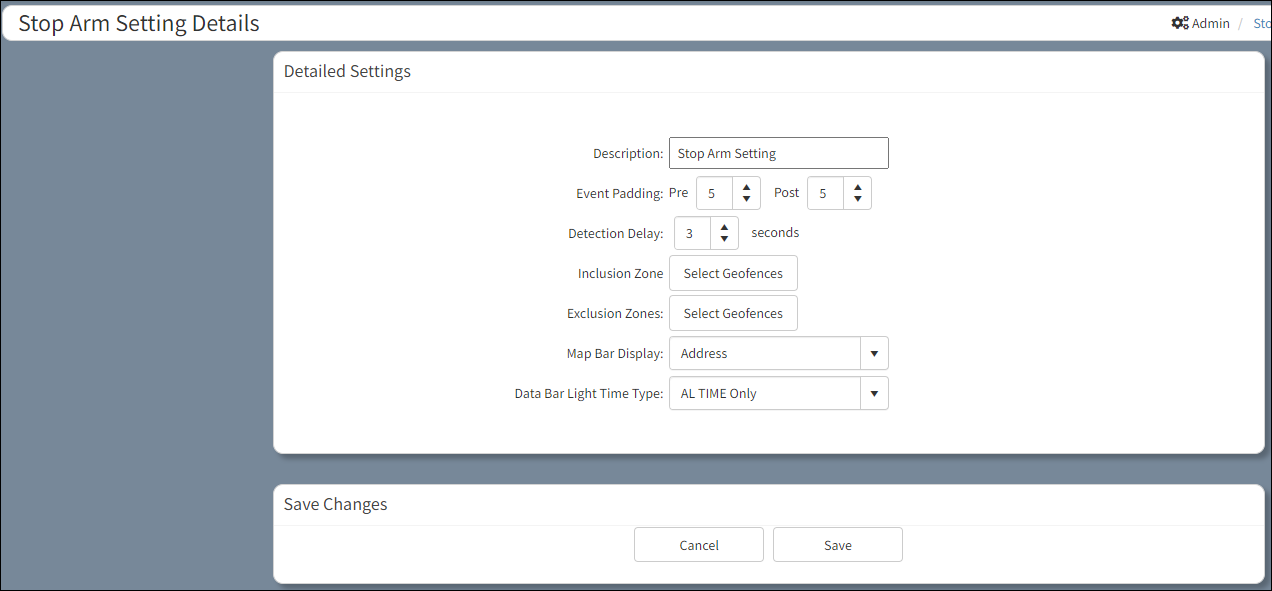
Stop Arm Setting Details
These settings should only be altered by personnel with a high level of system expertise.
Description – Where the stop arm settings are listed.
Event Padding – Pre and post padding is the number of seconds that will be downloaded before/after the event was recorded.
Detection Delay – Number of seconds allowed to transpire when the stop arm is deployed before violations are detected.
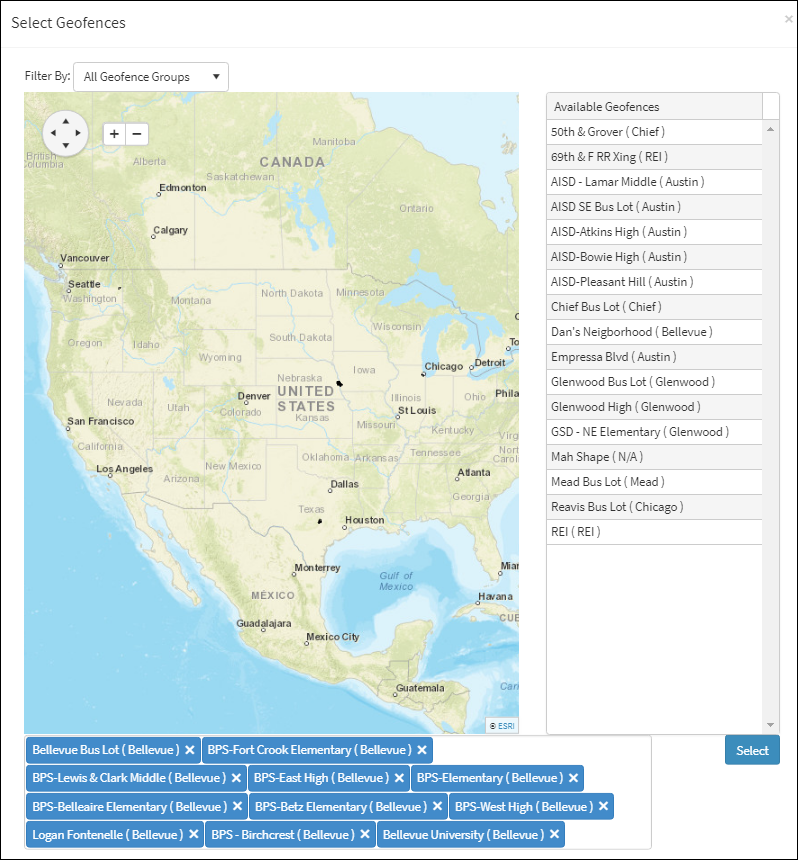
Click Select Geofences under Exclusion Zones to open the Select Geofences window where a geofence can be selected with areas determined to be exempt from detecting violation(s). Specific Geofence Groups can be filtered from the drop-down list that accompanies the Filter By: field. Once the selections are made, click the Select button.
Click Select Geofences under Inclusion Zones to open the Select Geofences window where a geofence can be selected with areas where detected violation(s) are accounted for. Specific Geofence Groups can be filtered from the drop-down list that accompanies the Filter By: field. Once the selections are made, click the Select button.

Select Geofences Window
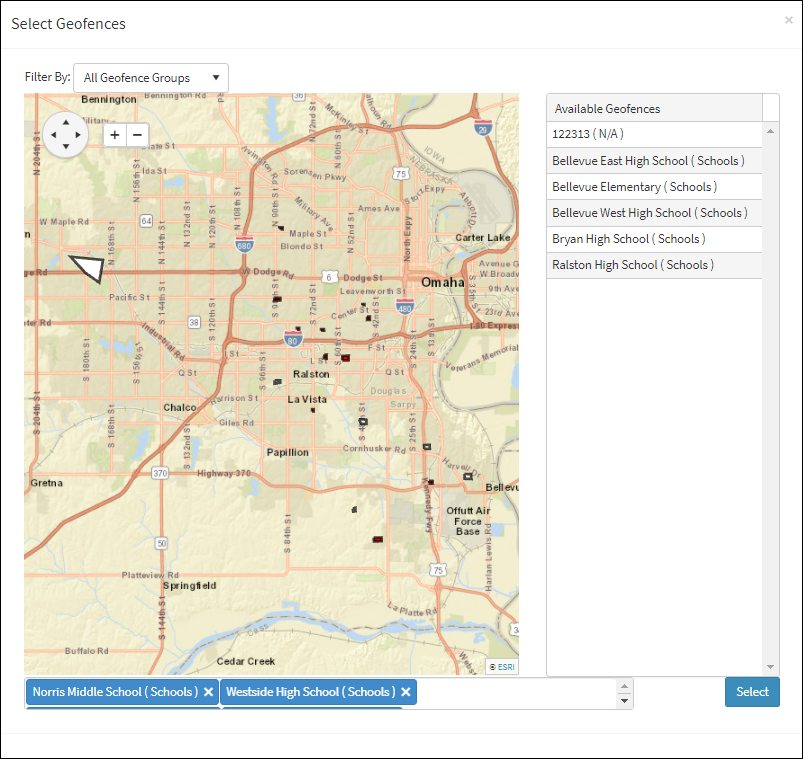
As the number of geofence selections increase, a scroll bar and arrow buttons appear next to the list of selected geofences to allow the user to scroll through the selections.

Scroll Arrows Appear on Select Geofences Window
When applicable, use the drop-down list for Map Bar Display: to select the map display format to the Geofences in either Address or latitude/longitude Coordinates.
When applicable, use the drop-down list for Data Bar Light Time Type: to select the Data Bar Light Time Type to either AL Time only or to AL Time and RL Time.
Save Changes
Once the schema has been configured click Save in the Save Changes box to complete the settings. Click Cancel to clear the configuration settings.
Delete a StopArm Setting
Click Delete to remove the Stop Arm Setting from the system. Any devices assigned this setting will be changed to the default setting. A confirmation message will appear asking to proceed with deleting the setting. Click Yes to delete. Click No to cancel the deletion.

Stop Arm Setting Deletion Confirmation
