Stops
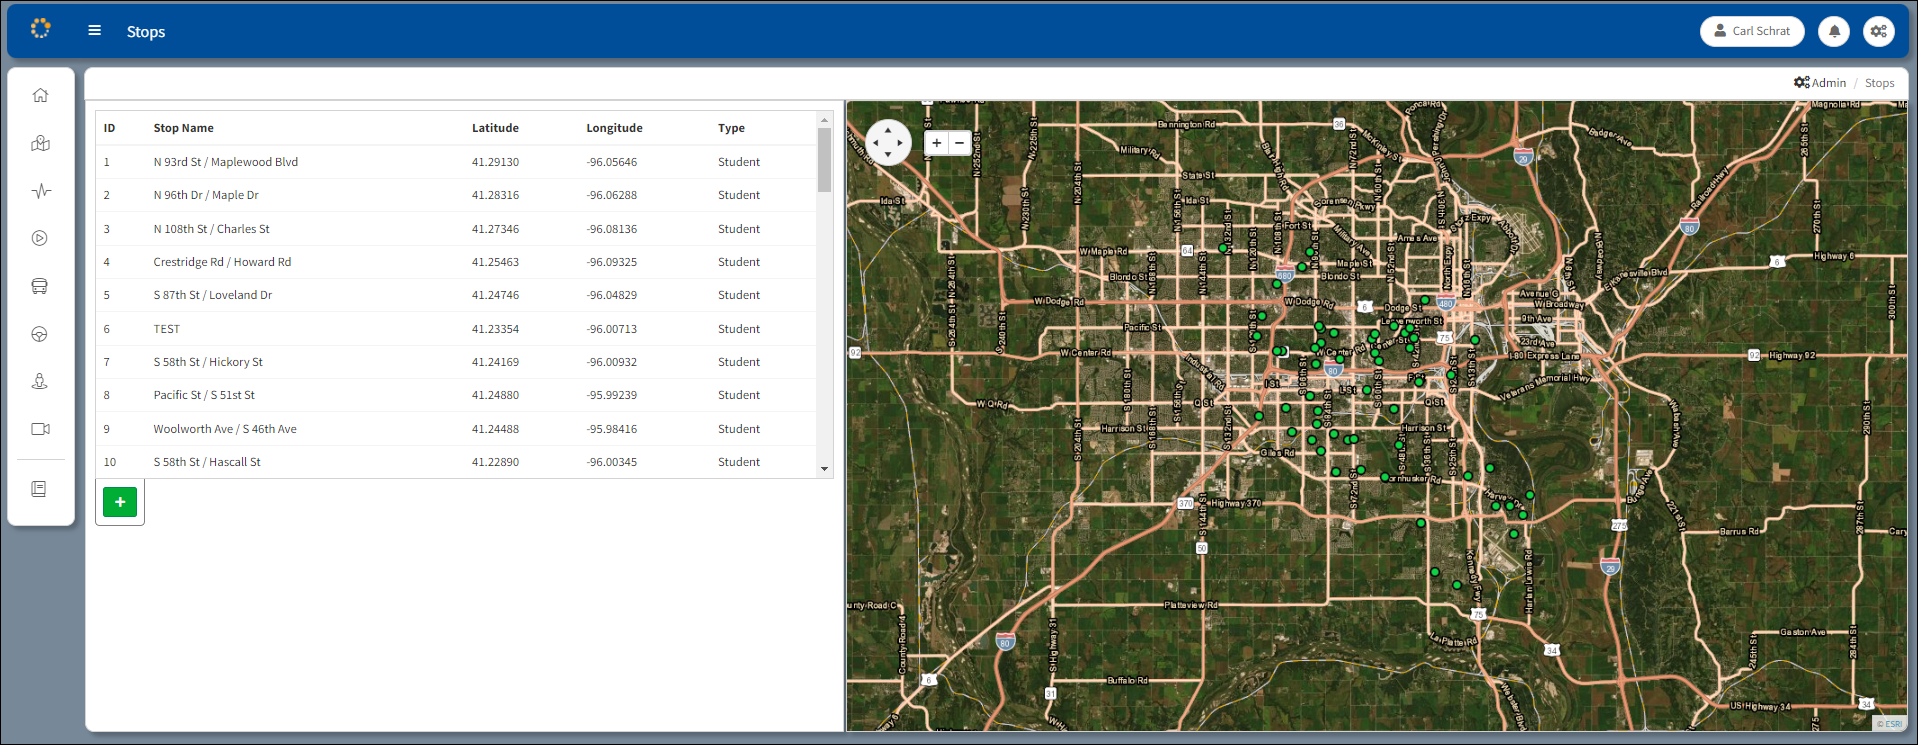
Stops can be added, managed, and changed from the Stops window.
From the Administration menu, select Stops to open the Stops window.
The Navigation tools are displayed below. Use the arrows on the Directional wheel to move on the map up and down or left to right. It is possible to navigate on the map by clicking and dragging the cursor on the map. The view can be expanded (+) or contracted (-) using the Zoom in/out buttons.
| Directional wheel | Zoom in/out buttons |
 | |

Stops Window
ID: School identification number.
Stop Name: Vicinity or address of the stop. Hover over the dot on the map to identify the stop. Click on the dot to prioritize the stop. The color of the dot will change from green to red.
Latitude: The coordinates of the stop on the route measured in latitude.
Longitude: The coordinates of the stop on the route measured in longitude.
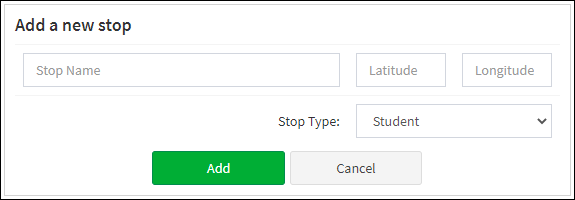
Add a new stop: Click on the map to locate the location of the new stop that will appear in the Stop Name box. Click on the Add New Stop button ![]() to open the Add a new stop dialog box. The name of the new stop is automatically generated with the Latitude and Longitude coordinates when the location is clicked on the map, but it is possible to rename the new stop.
to open the Add a new stop dialog box. The name of the new stop is automatically generated with the Latitude and Longitude coordinates when the location is clicked on the map, but it is possible to rename the new stop.
Stop Type: Click the drop-down and select Student, School, or Lot to identify the Stop Type.

Add a New Stop Dialog Box
Click Add to complete the addition of a new stop to the list of stops.
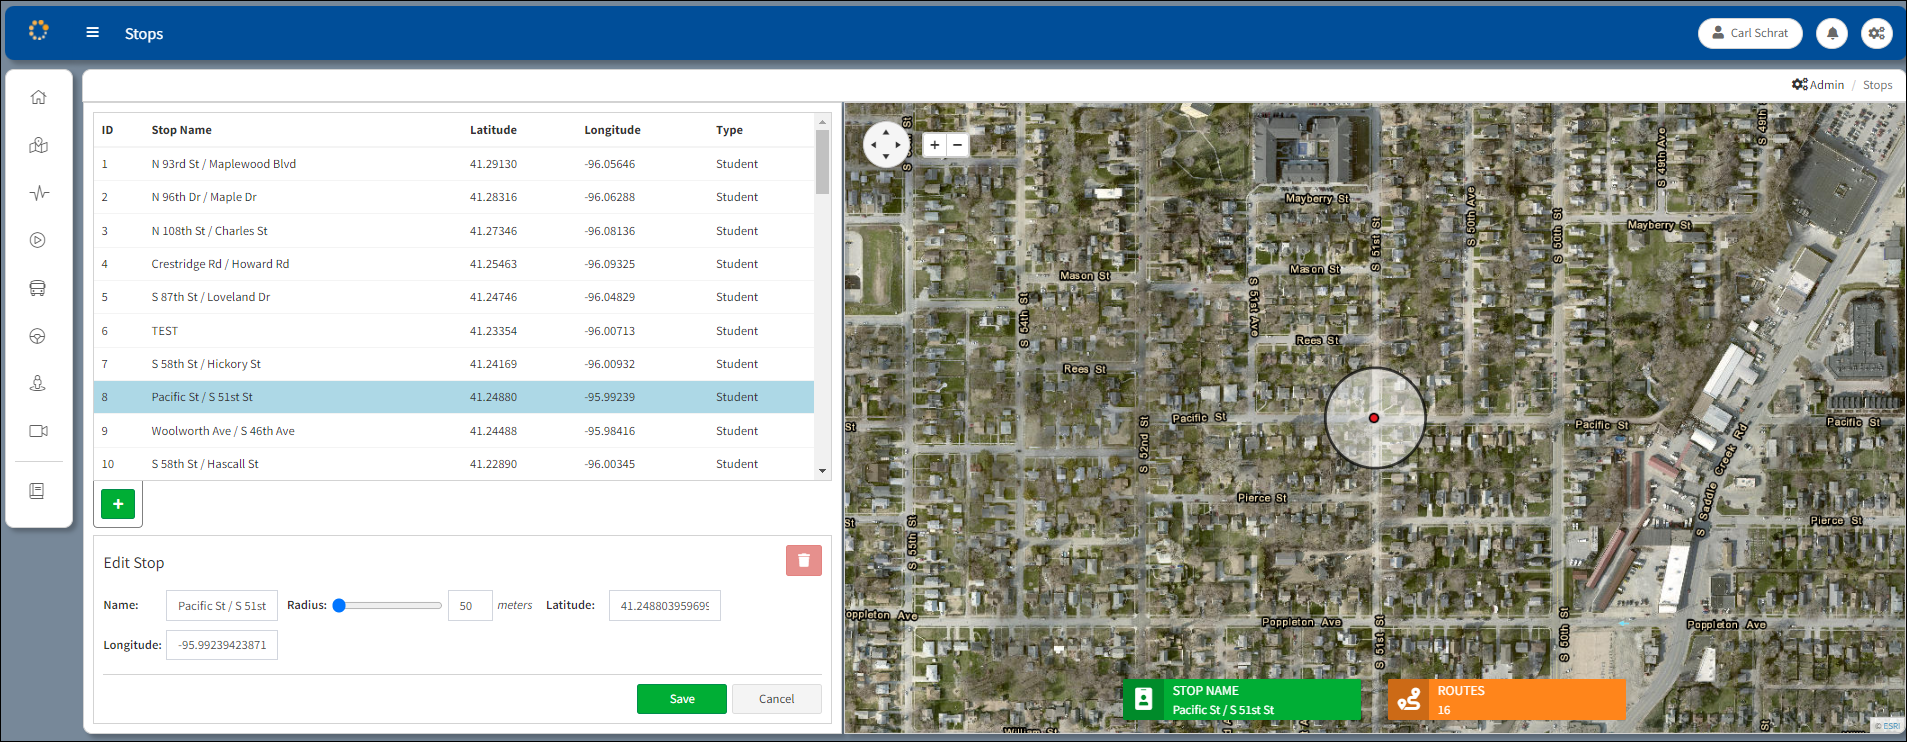
Details of a stop (i.e., Bellevue East) is displayed on the map. The Stop Name and the number of Routes are identified in boxes on the bottom of the map. The location of the selected stop on the map is highlighted with a red dot ![]() among the other stops that are identified by a green dot
among the other stops that are identified by a green dot ![]() on the map.
on the map.
Changing the Name or Location of a Stop
Click on the Stop Name in the table. The Edit Stop dialog box will appear.

Edit Stop Dialog Box
From the Edit Stop dialog box, the name of the stop in the text box can be changed along with the location settings in the latitude/longitude text boxes.
After making the edits, click Save. Click Cancel to cease making the edits. Click on the Delete Stop button ![]() to delete the stop.
to delete the stop.

Expanded View with Stop Identified on Map
Deleting Stops
Stops that are not used on an active route or is not attached to a vehicle group, can be deleted. The Home Lots or Routes box will indicate the stop is on zero routes. The Delete Stop button ![]() becomes active when the unused stop is selected on the list.
becomes active when the unused stop is selected on the list.
Delete Unused Stops
All unused stops on a route can be deleted, all at once, by clicking the Delete Unused Stops ![]() button. The Delete Unused Stops button is hidden until unused stops appear.
button. The Delete Unused Stops button is hidden until unused stops appear.
A confirmation message to delete the unused stop appears. Click Yes to delete. Click No to cancel.

Delete Unused Stops Confirmation Message
Radius
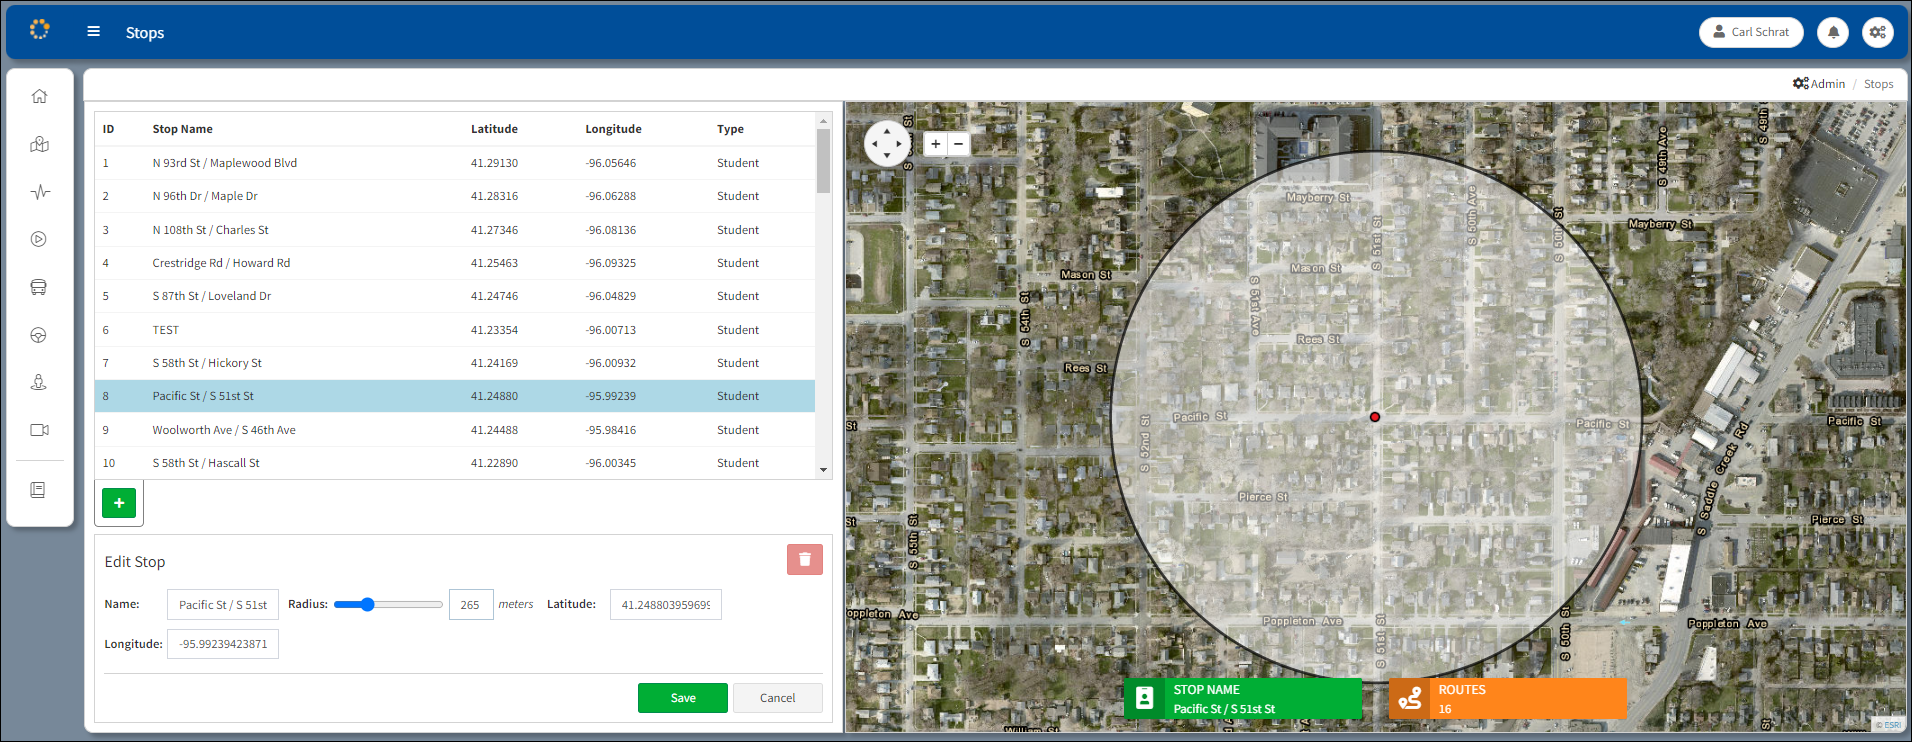
The Radius field allows the radius of the stop to be expanded or contracted. Drag the bar in the Edit Stop dialog box to the right to expand the area of the radius. Drag to the left to contract the area of the radius.
![]()
The default setting is 50 meters. The maximum extension of the radius is 805 meters.

Radius Extended to 265 Meters
