Trip Checklists
Before drivers leave the lot and upon returning, they can inspect the condition of their vehicle using Trip Checklists. The ARMOR checklist is integrated with a corresponding checklist that appears on the ARMOR Driver App.
A Trip Checklist can be edited, copied, and deleted.
The content and details of the checklist is determined and entered by the administrator.
The checklist is comprised of Sections and Items. Sections indicate the part of the vehicle that is of interest (i.e., front). Items are components (i.e. turn signals) or factors (i.e., fuel level) that the driver should check before operating the vehicle.

Trip Checklists Window
Actions Column
Open: Click the Open button ![]() to open a checklist.
to open a checklist.
Copy: Click the Copy button ![]() to copy a checklist and add it to the list of checklists on the window.
to copy a checklist and add it to the list of checklists on the window.
Delete: Click the Delete button![]() to clear the checklist from the window.
to clear the checklist from the window.
Click the Add New Checklist button ![]() to add a new checklist row to the window.
to add a new checklist row to the window.
Trip Checklist Usage
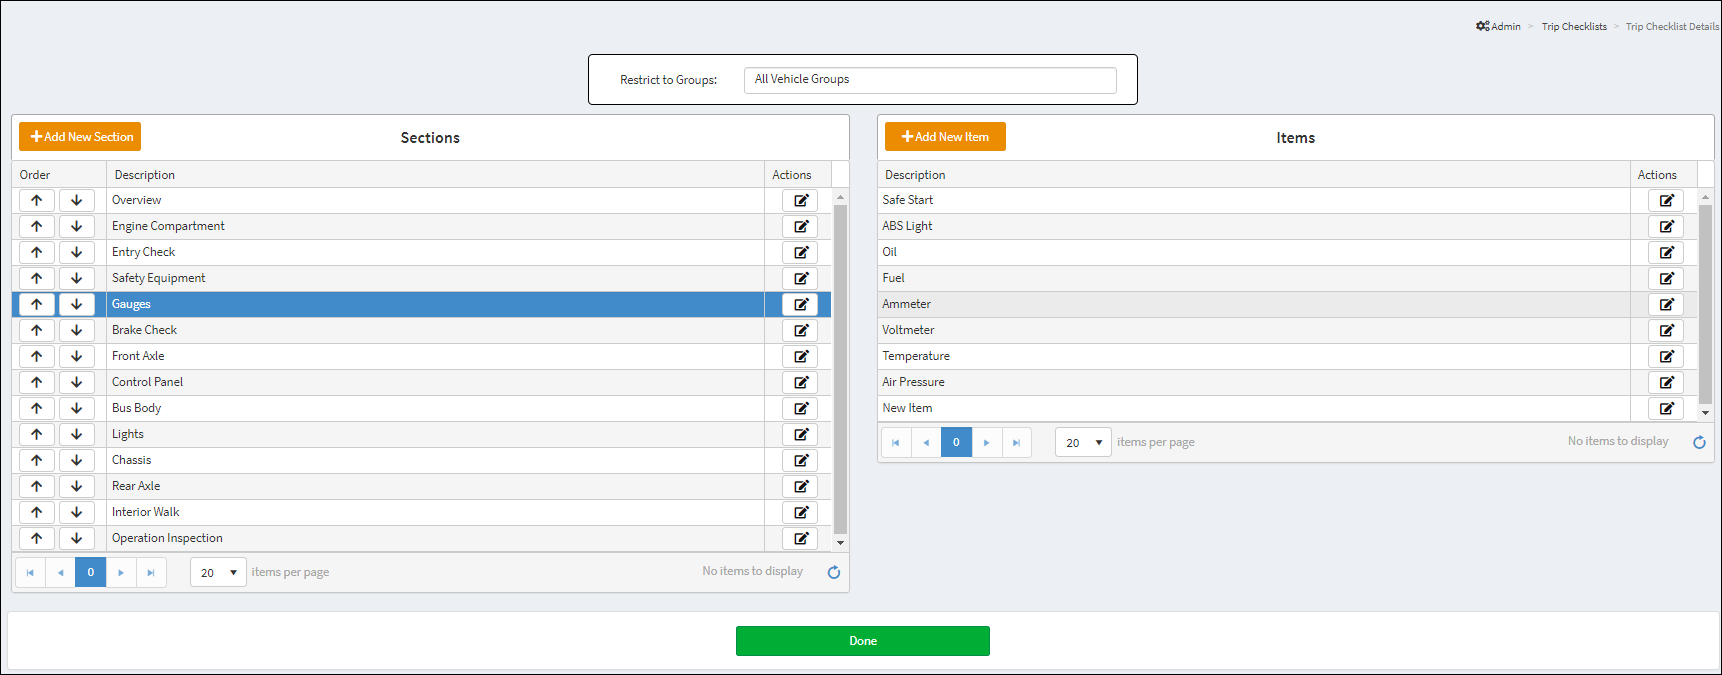
Click the Open button ![]() in the row of the selected checklist to open it. The checklist has a Sections table and an Items table. When a Section (i.e., Gauges) is selected, the corresponding items for the selected Section are listed in the Items table. The Items matched with a related Section are the subject of inspection to assure the vehicle is road worthy.
in the row of the selected checklist to open it. The checklist has a Sections table and an Items table. When a Section (i.e., Gauges) is selected, the corresponding items for the selected Section are listed in the Items table. The Items matched with a related Section are the subject of inspection to assure the vehicle is road worthy.

Add Trip Checklists
Restrict to Groups: Click in the text box to open a drop down of available vehicle groups. The user can narrow the checklist selection to specific vehicle groups. The default setting is All Vehicle Groups.

The Trip Checklist that is selected to apply to the specified vehicle group is individually listed on the main Trip Checklist window.
Sections
The Sections table displays a list of the areas of the vehicle the driver will inspect.
Click the Add New Section button ![]() to add on to the Sections list.
to add on to the Sections list.

Add Section to Checklist
Use the Order buttons ![]() to change the order the sections are displayed on the table.
to change the order the sections are displayed on the table.
To edit a new or existing Section, click on the edit button![]() to open the Edit Checklist Section dialog box.
to open the Edit Checklist Section dialog box.

Edit Checklist Dialog Box
After completing the edits, click the Save Changes button ![]() and the new or updated Section will be added to the Sections table. Click the Close button
and the new or updated Section will be added to the Sections table. Click the Close button ![]() to cancel the edit.
to cancel the edit.
To clear the Description from the table, click the Delete Section ![]() button. Click Yes to continue with the deletion. Click No to cancel.
button. Click Yes to continue with the deletion. Click No to cancel.

Delete Section Confirmation Message
Items
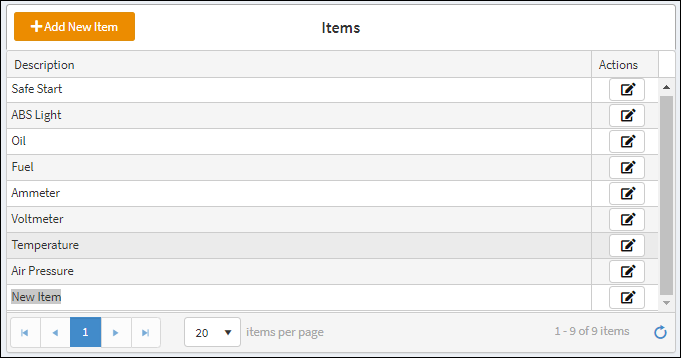
The Items table displays specific elements (i.e., fuel level or brake lights) that factor in the vehicle being able to safely operate.
Click the Add New Item button ![]() to add a new item to the Items list. The Edit Checklist Item dialog box will appear and the Description can be entered.
to add a new item to the Items list. The Edit Checklist Item dialog box will appear and the Description can be entered.

New Item Added to List
To edit a new or existing Item, click on the edit button![]() to open the Edit Checklist Item dialog box.
to open the Edit Checklist Item dialog box.

Edit Checklist Item Dialog Box
After making the edit, click the Save Changes button ![]() and the new Item will be added to the Items table. Click the Close button
and the new Item will be added to the Items table. Click the Close button ![]() to cancel the edit.
to cancel the edit.
To clear the Item from the table, click the Delete Item ![]() button. Click Yes to continue with the deletion. Click No to cancel.
button. Click Yes to continue with the deletion. Click No to cancel.

Delete Item Confirmation Message
Click the Done button after the Trip Checklist creation/edits are completed.
![]()
