Edit User

Contents
From the Users Initial window, click the Edit button ![]() and the Edit User Dialog box will open.
and the Edit User Dialog box will open.
Existing User Group

Edit Existing User
Personal Information
•First Name/Last Name – Name that identifies the user to the system. This will be the same value required to successfully log in to the system.
•Email – a valid email address for the user.
•Phone Number (optional) – a valid phone number for the user.
•User is an Active Directory user – For On-Premises installations. Reduces the amount of data needed to enter ARMOR making it easier for administrators to enter users.
Permissions
•User Type – drop-down list used to determine if the access level is User or Admin.
oAdmin has full access, including the Administration module.
oUser has access to designated areas only and excludes the Administration menu. Access to designated areas and the amount of control are set by selecting or clearing the check boxes that follow the User Type selection box.
•User Group – Select from the adjoining drop-down list the vehicle group(s) that is associated with the new user. Select an existing group (i.e., Fleet_Manager), or Custom.
Click the tabs that will be associated with the new user. Once the groups for restriction are set, these groups will be the only groups accessible when the user logs into the system. Multiple groups can be selected for access.
After selecting all values, click Save to save the user. An email will be sent to the user with notification that a new account has been created by the ARMOR administrator. The new user will then appear as a new entry in the control panel.
Custom User Group
Select Custom User Group from the User Group drop-down. Only with the User Type set to User, and User Group set to Custom Group, will the ARMOR applications be displayed on the Permissions dialog box.

Custom User Group
Permissions (Custom Group)
User Type: Select from this drop-down to set permissions for User or Admin.
User Group: Select from this drop-down to set an existing group (i.e., Fleet Manager), or Custom Group.
Applications that the user group has permissions to use are highlighted in gold. Applications in gray indicate the User Group does not have access permission.
Allowed Vehicle Groups: Selection of specific vehicle fleets that have permission to have selected applications activated.
Advanced Settings
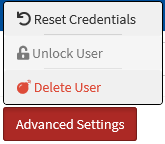
For information about Reset Credentials, refer to the Reset Password section.
Unlock User
If a user is locked, it is indicated as (Locked) next to the status entry in the Account Status column. To unlock the user, click the Unlock User button in the Actions Dialog Box. A prompt asking to confirm unlocking the user will appear. Click 'Yes' to unlock the user.

Unlock User Confirmation
Delete User
To clear the user from the User Name listing, click the Delete User button in the Actions Dialog Box. A prompt asking to confirm deleting the user will appear. Click 'Yes' to delete the user.

User Deletion Confirmation