Play Video in Auto-Pilot
Playback of video uses the same controls described in Video Playback.
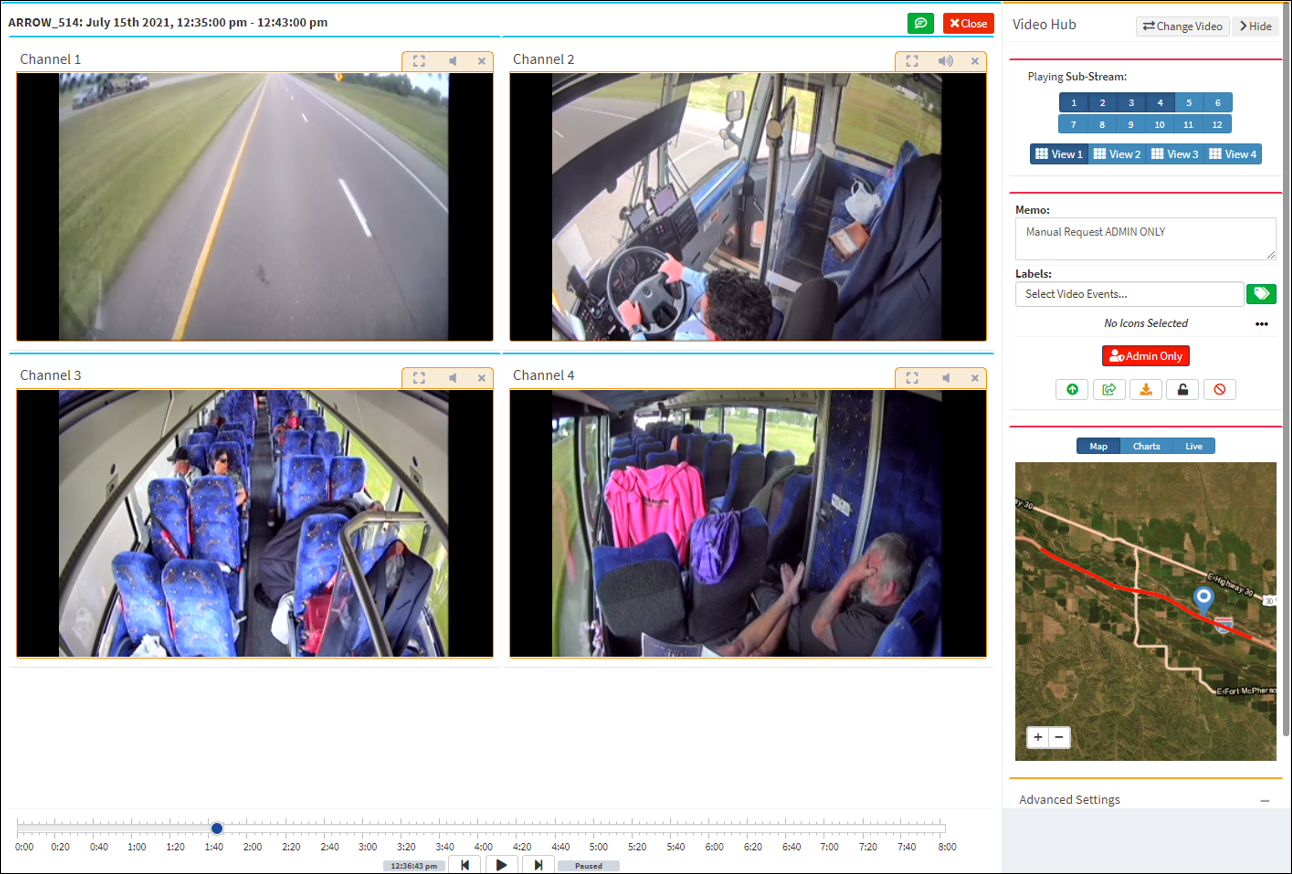
AutoPilot Video Window
AutoPilot video playback consists of the following features:
Video Comments
Click on the Video Comments ![]() button to open the comments dialog box. Refer to the Video Playback section for more information about using the Video Comments functionality.
button to open the comments dialog box. Refer to the Video Playback section for more information about using the Video Comments functionality.
Video Hub
The Video Hub side bar can be collapsed by clicking on the Hide ![]() button. The Video Hub view can be restored by clicking on the Video Hub
button. The Video Hub view can be restored by clicking on the Video Hub ![]() button.
button.
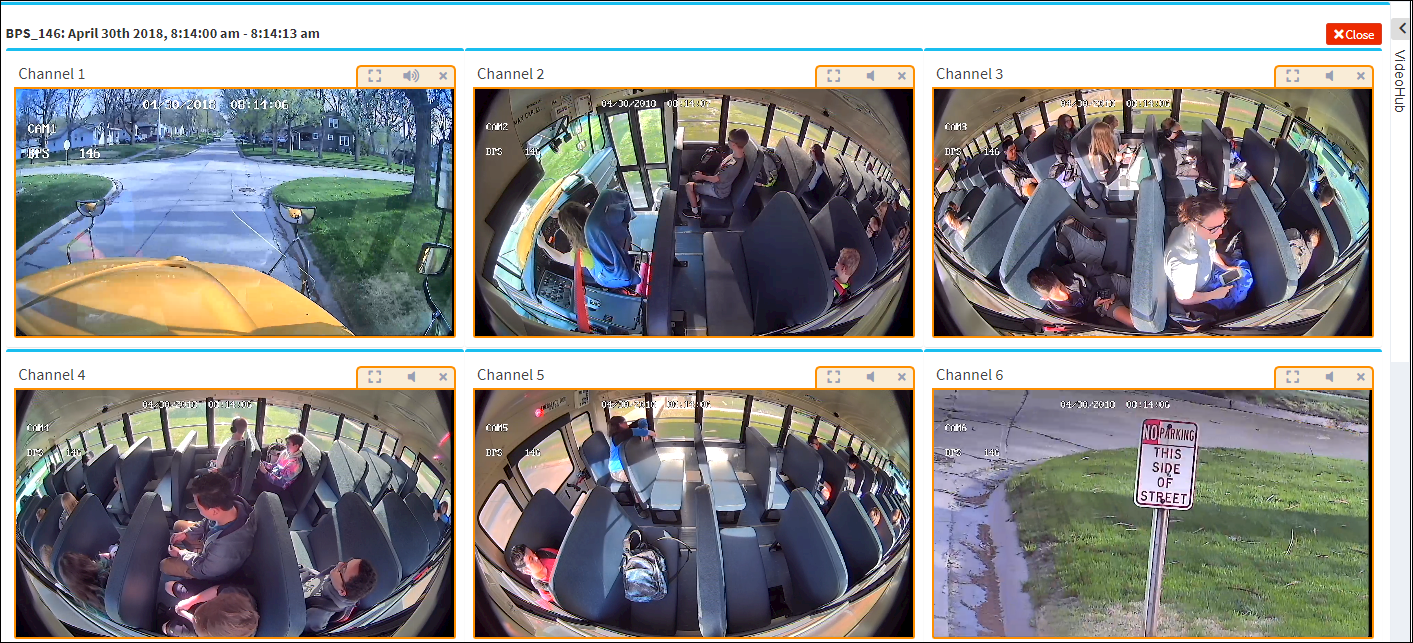
AutoPilot Video Hub Collapsed
Change Video
Users can make video selections from directly within the video player to save time opposed to closing the video player, returning to the video grid, and searching for another video.
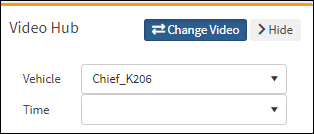
Change Video Selected
Clicking on the ‘Change Video’ ![]() button from the top of the Video Hub accesses a pair of drop-down menus. The first is the Vehicle drop-down that displays all the vehicles that have available videos. The second is the Time drop-down that displays the date and time of the videos pertaining to the specified vehicle. It is possible to only change the date and time for an existing vehicle selection.
button from the top of the Video Hub accesses a pair of drop-down menus. The first is the Vehicle drop-down that displays all the vehicles that have available videos. The second is the Time drop-down that displays the date and time of the videos pertaining to the specified vehicle. It is possible to only change the date and time for an existing vehicle selection.
Select a vehicle from the Vehicle drop-down. Select an available date and time from the Time drop-down. When the change video function is enabled, the 'Change Video' button ![]() changes to indicate the functionality is active. Click the 'Change Video' button to close the change video function.
changes to indicate the functionality is active. Click the 'Change Video' button to close the change video function.
Information
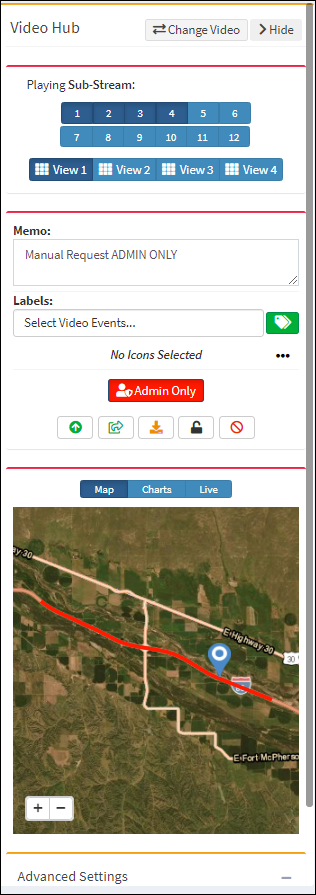
Video Hub
Playing Main Stream or Sub-Stream – The appearance of 'Playing Main Stream' indicates the video has been selected in ARMOR Actions, or manual download, to play in Main Stream quality. The recommended video play for automated downloads is the 'Playing Sub Stream' quality setting.
Channel Views
A different array of channels can be viewed by selecting one of the four Channel View buttons above the Channel bar. This enables the viewer to review a group of channels simultaneously without displaying the entire number of available channels. A fewer number of selected channels allows a larger view of the selected channels. For example, the View 1 array of channels could encompass channels 1 through 6 and View 2 could just include channels 7 and 8. The channels to include in an individual Channel View (i.e. View 1) can be set by clicking on a View button followed by clicking on the individual channels (i.e. 1 through 4) to include on the Channel View.
![]() Click on Individual Channel View (View 1)
Click on Individual Channel View (View 1)
![]() Click on individual channels (i.e. 1 through 6) to include in the Channel View (i.e. View 1)
Click on individual channels (i.e. 1 through 6) to include in the Channel View (i.e. View 1)
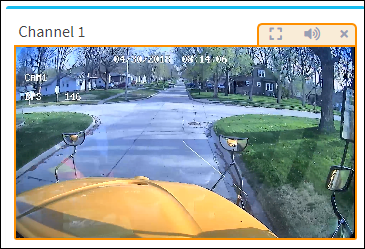
Individual Channel
Above each channel window there are three buttons in the upper right corner of the window to allow the user to expand the channel to encompass the entire video playback window (click again to contract the window view)![]() , mute the sound of the video
, mute the sound of the video ![]() , and close the channel
, and close the channel ![]() .
.
It is possible to zoom in and zoom out within an individual channel. Once the channel has been expanded by clicking on the![]() button, a new set of buttons
button, a new set of buttons ![]() appear in the upper right corner of the image. Clicking on the zoom in
appear in the upper right corner of the image. Clicking on the zoom in![]() button allows the image to be expanded while clicking on the zoom out
button allows the image to be expanded while clicking on the zoom out![]() button zoom the image towards its initial view. Click and drag the cursor in the image to pan within the frame. Click the
button zoom the image towards its initial view. Click and drag the cursor in the image to pan within the frame. Click the![]() button to revert to the view with multiple channels. Refer to the Video Playback section in the Introduction for more information about zoom in and zoom out and panning video.
button to revert to the view with multiple channels. Refer to the Video Playback section in the Introduction for more information about zoom in and zoom out and panning video.
Show Blurs – Clicking the Show Blurs button  allows the user to conceal any details in the video by creating and applying a blur over the image. Click the Clear All Blur Effects
  button to erase the blurs. It is also possible to apply motion to the blur effects. Refer to the Video Playback section for more information about using the Show Blurs functionality.
Memo – Description of the AutoPilot video and any unique characteristics about the video.
Labels – User can add a label to a video to make the video distinct and easier to filter.

Click the Labels ![]() button to open the Labels dialog box.
button to open the Labels dialog box.
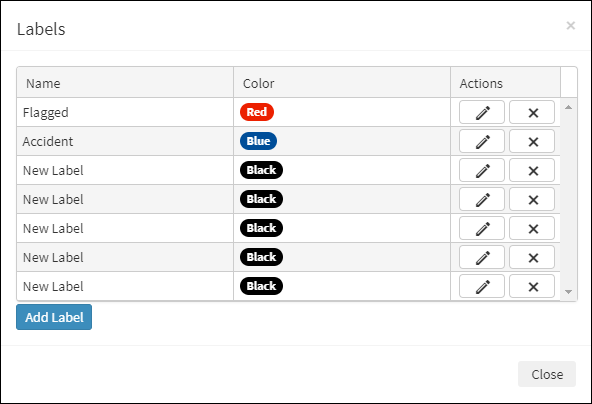
Labels Dialog Box
From the Labels dialog box, click Add Label ![]() to add a label to the list of existing video labels. In the Actions column, the label can be edited or deleted.
to add a label to the list of existing video labels. In the Actions column, the label can be edited or deleted.
To edit a label, click the Edit button ![]() in the Actions column and the Name (i.e., Accident) can be changed. From the Color column, the user can select from six colors from a drop-down menu for the color of the label.
in the Actions column and the Name (i.e., Accident) can be changed. From the Color column, the user can select from six colors from a drop-down menu for the color of the label.

Edit Name and Color of Label
After making the edits, click the finish ![]() button to complete the changes.
button to complete the changes.
Click the delete button![]() to clear the labeled video edit.
to clear the labeled video edit.
Click ![]() to delete the label from the Labels dialog box. A confirmation message will appear prompting to proceed with deleting the label.
to delete the label from the Labels dialog box. A confirmation message will appear prompting to proceed with deleting the label.

Delete Confirmation Message
Click OK to proceed. Click Cancel to stop the label deletion.
Admin Only – Click the Admin Only button from inactive ![]() to active
to active ![]() to indicate the video is restricted to administrators. The video that is restricted to administrators is identified on the grid with the Admin-Only label
to indicate the video is restricted to administrators. The video that is restricted to administrators is identified on the grid with the Admin-Only label ![]() in the Memo column.
in the Memo column.
Icons – The icons ![]() that are in use for the video is displayed on the Video Hub. When no icons are in use, No Icons Selected will appear in place of any icons.
that are in use for the video is displayed on the Video Hub. When no icons are in use, No Icons Selected will appear in place of any icons.
Video Action Controls – Request Main Stream, Share Video, Download, Lock Video, and Delete Video buttons. Refer to the Actions section for more information about using the Action Controls.
![]()
Request Main Stream – Click the Request Main Stream button  to upgrade AutoPilot video from sub-stream to main stream quality. A confirmation message will appear to proceed with the request for main stream video quality. Click 'Yes' to proceed. Click 'No' to cancel.

Mainstream Video Confirmation
Data Pane
Map display, Charts Data or Live Data can be selected and displayed.
![]()
Map
Shows the current location of the vehicle when the stop arm video was recorded. The view can be zoomed in and out using the +/ - buttons on the map display. The movement of the vehicle icon on the map![]() correlates with the video during the playing of the video. Click on any area of the route outlined in red while the video is playing, and the video will resume play from the point the user changed the location of the vehicle icon on the route.
correlates with the video during the playing of the video. Click on any area of the route outlined in red while the video is playing, and the video will resume play from the point the user changed the location of the vehicle icon on the route.
Hover over the vehicle icon and a flag appears indicating the current location.
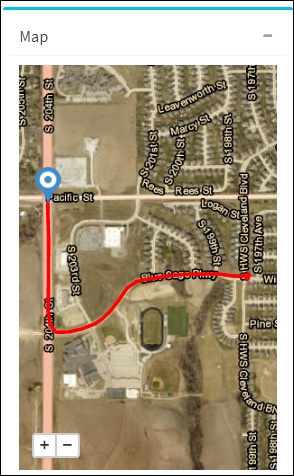
Map Dialog Box
Charts
Graph display can be adjusted to depict only Speed (MPH) or only Acceleration, or select none or both, by clicking on the Speed and Acceleration icons at the bottom of the graph.
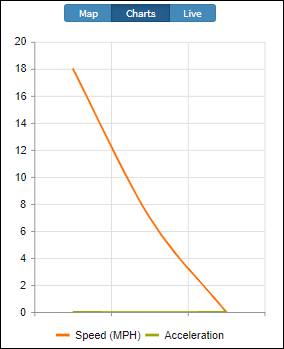
Speed and Acceleration
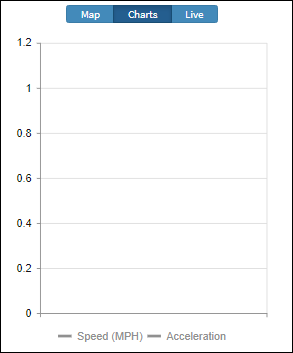
None Selected
Live
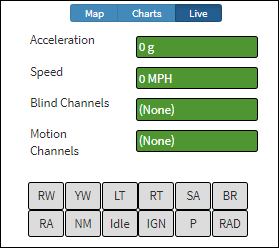
Live Data Dialog Box
Acceleration (g) – Rate of acceleration of the vehicle when the video was recorded.
Speed (mph) – Speed of the vehicle when the video was recorded.
Blind Channels – Channels that are blocked by objects or covered when recording (turned on initially at DVR).
Motion Channels – Channels that record moving objects (turned on initially at DVR).
Input Channels – Selected inputs that were recorded events at the time the video was recorded.
Advanced Settings
Use the Max Channels counter to set the number of channels displayed for viewing. The default number of channels is six. If more than six channels are selected, a message appears stating that problems with certain browsers can occur when more than six videos are played simultaneously. For information about utilizing a fix to allow the playing of more than six channels, refer to the Video Playback Fix at the end of the Video Playback section section under the Introduction of this manual.
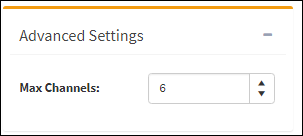
Advanced Settings Dialog Box
Video Playback
Video can be played, paused and reversed from the video playback control at the bottom of the Video Playback window. The progression of the video playback as the video is played is displayed on the tracking bar above the playback buttons.

AutoPilot Video Play Scale
During video playback, the forward and back buttons are grayed-out and inactive.

AutoPilot Video Play Scale, Video Playing
When there is an active ARMOR Action in the video, it is identified with a pair of green bars that encompass the portion of the video play scale when the event occurred.

Video Playing
When the playback indicator passes through the green bars, the ARMOR Action event is identified in the green box at the bottom of the scale.

Event Identified on Scale
Click the ![]() button in the top right corner of the window to end the video reviewing session and return to the main page.
button in the top right corner of the window to end the video reviewing session and return to the main page.
