StopArm
The REI automated StopArm solution improves student and community safety by monitoring and deterring potential violators. The REI StopArm package includes motion-activated high resolution, day/night sensor cameras that are optimized for viewing while compensating for vehicle headlights, providing a clear image of the front and rear license plates. The violation video is recorded on your REI DVR, flagged on ARMOR-StopArm and transmitted automatically via a cellular 3G/4G or Wi-Fi network for review, allowing a citation to be issued if warranted.
A summary of the status of all video events that allows for quick filtering can be achieved using the Summary Boxes in the top of the StopArm Window (see Summary Boxes for more details).
A report view of the event is available (refer to View Report for more details).

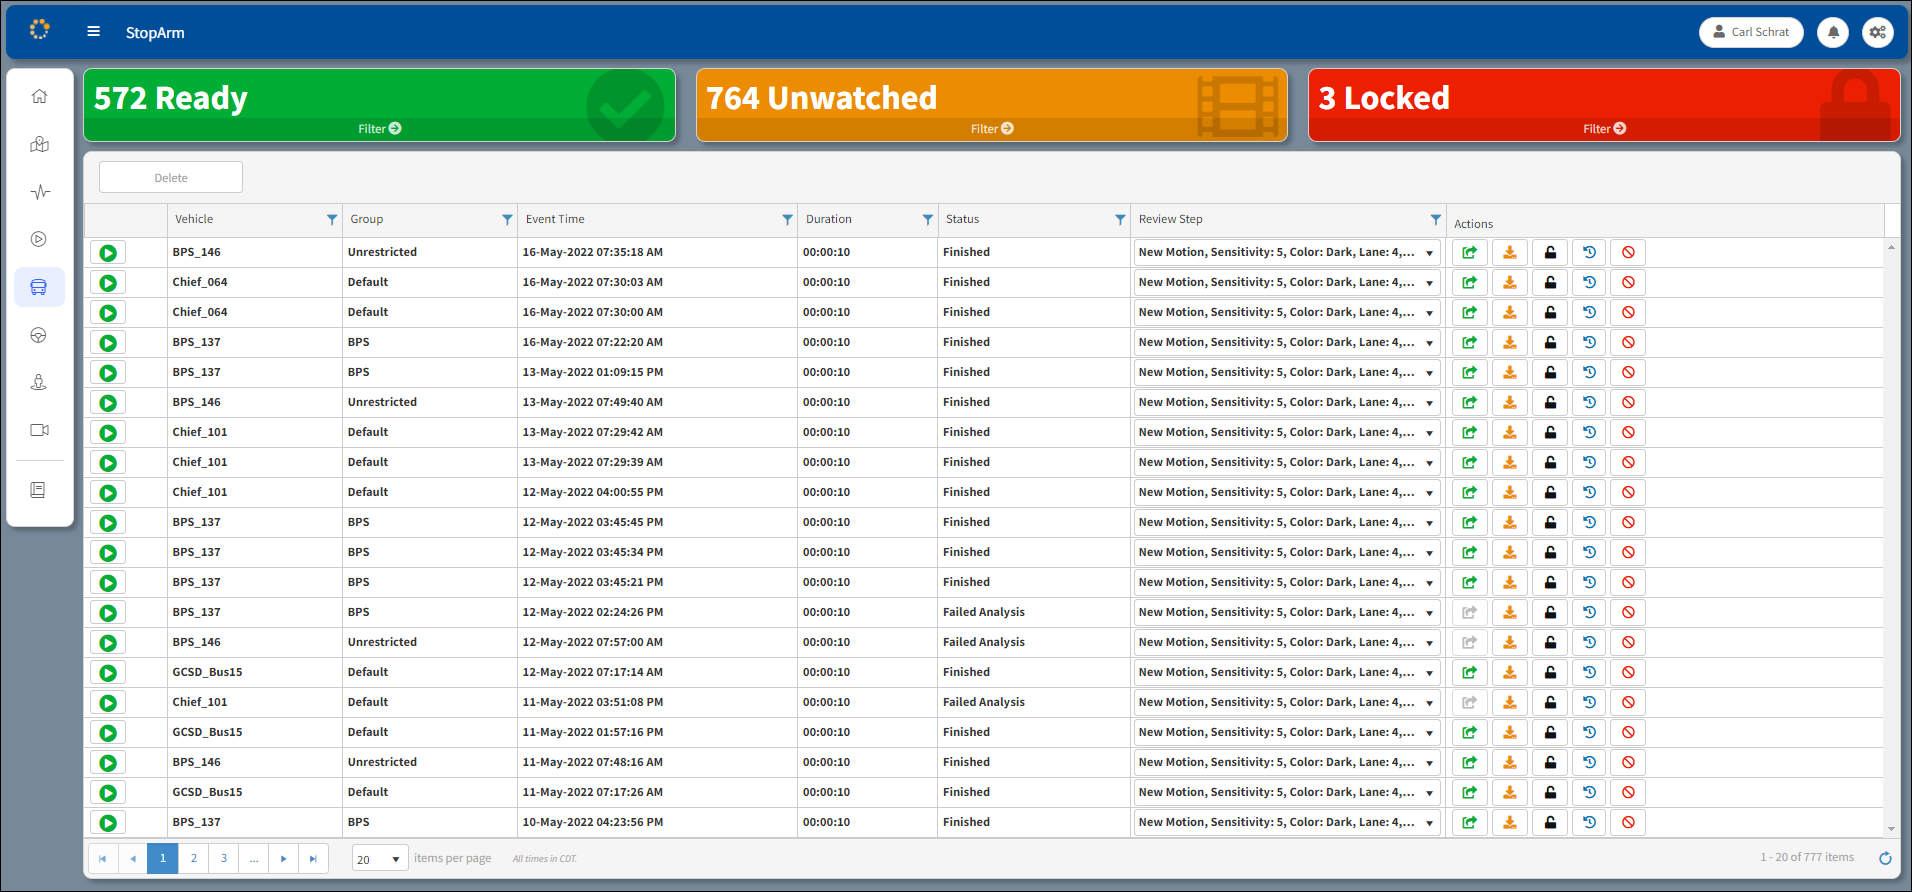
StopArm Initial Window
Immediately below the Summary Boxes is the heart of the StopArm module, the Video Event Table View. Each row corresponds to a single video event and contains the following data fields.
Delete – Allows for deleting multiple files simultaneously.
1.Select one or more rows to be deleted.
2.Selecting the rows is achieved by clicking on the first row and holding the Control key to select subsequent rows for deletion. Click the first row and hold the Shift key to select multiple rows at once for deletion.
3.Click the delete button.
4.In the Confirmation Dialog box, click Yes to confirm deletion or No to exit the dialog box without deleting.
•![]() Play – Found at the left of each row is the play button, which will become available once the event has been completely processed by the system. Clicking this button will launch event playback. (See Play Video In StopArm for more details).
Play – Found at the left of each row is the play button, which will become available once the event has been completely processed by the system. Clicking this button will launch event playback. (See Play Video In StopArm for more details).
•![]() Filter – See Filtering for information about using the filters in this section.
Filter – See Filtering for information about using the filters in this section.
•Vehicle – Displays the vehicle name assigned to the DVR from which the event was downloaded. This value is typically set on the mobile DVR during installation.
•Driver – The driver of the vehicle.
•Group – The group which the vehicle is assigned.
•Event Time – The exact date and time that the video event took place.
•Duration – Indicates the length of the video event, which is the length of the event plus pre-event and post-event time.
•Status – Indicates the current processing status of the request and can have several of the following possible values:
oWaiting for Vehicle – Indicates the request has registered with the server, but the vehicle is not in range of the system.
oDownloading – Indicates that the system is downloading data related to the event from the appropriate mobile DVR.
oConverting – Indicates the video is in the process of format conversion.
oAnalyzing – The video is being readied for stop arm video display (i.e. showing license plate number, xml file creation).
oFinished – Indicates that the server has received all required data and is performing any additional processing required.
oFailed to Download – Video did not complete downloading from DVR.
oFailed Conversion – Video did not complete converting from DVR.
oFailed Analysis – The processing of the stop arm video was not completed.
oIn Queue indicates that the request has registered with the server and the vehicle is in range, but the video has not yet been downloaded to the server for further processing.
Note: A vehicle in pending state will not receive ARMOR alerts.
•Review Step – Steps assigned to the processing and confirmation of the potential violation.
•Actions – Consists of controls related to each video event under the actions column (see Actions for more details).
Items per page Counter
Use the arrow buttons on the tool bar in the lower left corner to page through the table. The number of items displayed on each page can be adjusted using the items per page drop-down list as shown below. The number of items per page can be set to 20, 50 and 100. The default setting is 20 items per page.
Items per page tool bar
