Semesters

Contents
Prerequisites
The student and parent identities will have had to have been successfully entered into the system. This requires a mass importation of student/parent data into the student server (i.e., mass import in the form of a file in CSV format).
For information about importation of Student and Parent data, refer to the Students and Parents sections in Administration where the process of importing student and parent files in CSV format are outlined.
If there is a need for further assistance with the importation of data, refer to the Technical Support page of this manual and contact REI for technical support.
This section outlines the usage of the Student system under the condition that the data has been successfully imported onto the server.
Semesters Window
The Semesters window enables settings to be made for Semesters and Schedules along with Off Days/Delays from a single page.

Semesters Window
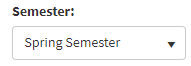
Semester:
Select a semester (i.e., Spring) from the Semester: drop-down menu.
Click the New Semester ![]() button to open the New Semester dialog box.
button to open the New Semester dialog box.

New Semester Dialog Box
Enter the Name of the new semester (i.e., Spring of 2020) and click on the calendar icons to set the Start Date and the End Date.
Click Submit to add the new semester. Click Cancel to stop the addition of the new semester.
Semester Settings
If an existing semester is selected from the Semester drop down, it can be edited and saved, archived or deleted.
After making edits to the Semester Settings, click the Save ![]() button.
button.

Changes to Schedule Saved
Click the Archive button ![]() to store a semester record. A confirmation message will appear for verification. Click Yes to proceed with archiving. Click No to cancel.
to store a semester record. A confirmation message will appear for verification. Click Yes to proceed with archiving. Click No to cancel.

Archive Verification
Click Yes and the semester is archived and the Archive button becomes the Reactivate ![]() button.
button.
When the semester is archived, the routes for the archived semester are not processed. Archived semesters are hidden, including from the main student page, until reactivated.

Archived Semester
Click the Reactivate ![]() button to return the semester to Active status. A confirmation message will appear for verification.
button to return the semester to Active status. A confirmation message will appear for verification.

Semester Reactivation Message
Click Yes to continue. Click No to cancel.
Click the Delete ![]() button to remove a semester. A confirmation message will appear for verification.
button to remove a semester. A confirmation message will appear for verification.

Semester Delete Confirmation
Click Yes to continue. Click No to cancel.
Route Group Settings
The user can add new route groups, view, and delete routes.
The planning of when vehicles will go on route are reviewed on the Route Group Settings Window. The information entered in the table is used by the system to determine when each bus is supposed to go on its assigned route.
Name: The name of the route group (i.e., morning, early afternoon, night, or late afternoon).
Direction: To School or From School.
Start Time: The time when the route group is supposed to start.
End Time: The time when the route group is supposed to end.
Days: Days of the week for which the route group is scheduled.
Name, Direction, Start Time, End Time, and Days entries can be sorted and filtered by clicking the ![]() icon and selecting the check boxes in the corresponding drop-down menu. Refer to the Sorting and Filtering section in the Introduction for information about using filters and the Items per Page Counter.
icon and selecting the check boxes in the corresponding drop-down menu. Refer to the Sorting and Filtering section in the Introduction for information about using filters and the Items per Page Counter.
Actions Column
Edit Routes
Click the Edit Routes button![]() to open the Route Editor window for a corresponding group of routes (i.e, Morning Routes).
to open the Route Editor window for a corresponding group of routes (i.e, Morning Routes).
Click Delete to remove the route schedule. A confirmation message will appear asking whether to proceed with deletion. Click Yes to proceed. Click No to cancel.

Delete Schedule Confirmation Message
Auto Route Creation Errors Window
When errors occur during the processing of a new route, it is identified with the Route Creation Error button ![]() in the Actions column. Clicking on the button opens the Auto Route Creation Errors window.
in the Actions column. Clicking on the button opens the Auto Route Creation Errors window.

Auto Route Creation Errors Window
From the Auto Route Creation Errors window, the route group can be deleted, or the user can retry to auto create the route.
Click on the New Route Group button ![]() to open the Route Group Creator window with the New Route Group dialog box where a schedule for the new semester can be set up and added to the table.
to open the Route Group Creator window with the New Route Group dialog box where a schedule for the new semester can be set up and added to the table.
Route Group Creator
From the New Route Group dialog box, enter the name of the route and select the Direction as either To School or From School. Click on the Days buttons to select the days of the week the route is run. By default, Monday through Friday is selected.

Route Group Creator Dialog Box
Name: Name that identifies the new schedule.
Direction: The route is To School or From School.
Days: Select the buttons for the days of the week the route is active.
Previous/Next: Click Next to go to the next dialog box to select a Creation Type.

Enter Name of New Route Group
Click Next to continue to the next window to select a new Route Creation type.
Create New Route Group
Select an Auto, Import, or Manual Creation Type.

New Route Group Dialog Box
Creation Types:
Select one of the buttons to determine the type of route to setup.
Auto: ARMOR self-generates the route
Import: Enables the user to import an existing route to create a new route that emulates the imported route
Manual: Forwards the user to the Route Editor page where a new route is created by the user
Arrival Time: For Auto Creation Type only for To School routes. A drop-down used to set the time the vehicle arrives upon the route being completed.![]() Example: The arrival time must be at least 02:00 AM (120 minutes after the start of the day, 12:00 AM).
Example: The arrival time must be at least 02:00 AM (120 minutes after the start of the day, 12:00 AM).
If the route is From School, the Arrival Time field becomes Departure Time, which is the time that the bus leaves the first stop (typically the school).
Max on Bus Time: For Auto Creation Type only. The maximum length of time students are allowed to be on board the vehicle. The default setting is 90 minutes.
Previous/Next: Click Previous to revert to the initial Route Group Creator window. Click Next to advance to the selected creation type window.
Auto Creation Type
Selecting the Auto Route Creation type enables the route to be created by ARMOR. The user selects the Vehicles by Group, Individually, or All. The Stops are selected in the same method as Vehicles. The Start Time/End Time is determined automatically. Entering the arrival time of the student and the maximum time the student is allowed on the bus is also required.

Create an Auto Route
Vehicles
There are three Vehicle options:
All: Available vehicles that can be selected in Auto
Group: User can select an available vehicle group
Select: User can select individual vehicles available in Auto

Select a Vehicle Group
Under Vehicles, select either All Vehicles, Groups for vehicle groups, or Select for individual vehicles.

Specific Vehicles Selected
Stops
Select a Stop type.
Auto: Enables the stops to be created by ARMOR
All: All available stops that can be selected in Auto
Select: User can select specific stops available in Auto
Max Walking Distance: For Auto Creation Type only. The maximum number of meters students are allowed to walk to a stop. The default setting is 95 meters.

Specific Stops Selected
After the Vehicles and Stops entries are made, click Create to generate the new route.
As a route is in the process of being created, a message indicating the route is being created, appears on the Actions column.

Route Being Created Message
When the route has students that cannot be included on the new route, a warning message will appear.

Unroutable Students Message
When there is students that are on another route at the time the new route is being created, the students are listed in a table.

List of Students on Other Routes
Click Previous to revert to the previous screen. Click Create to continue.
Import Creation Type
It is possible to save time by importing all the route data into a semester.
On the Route Group Creator window, click the Import button under Creation Type.

Select Import Route Creation
Set the Start Time and End Time of the route using the drop-downs for the Start Time and End Time fields.
Start Time: The time the route starts. Applicable only for Import and Manual Route Types.
End Time: The time when the route ends. Applicable only for Import and Manual Route Types.
Hover over the Question icon ![]() and a message displays the required format of the uploaded file.
and a message displays the required format of the uploaded file.

Uploaded File Requirements
Click the Choose File button and a CSV file modal containing the parent/student data files will open. Click on the selected file and click Open. Click Cancel to back out of the file modal.

Route Data Files
When a file is selected it will be identified next to the Choose File button.

File Selected
The format of the CSV file has the routes grouped by vehicle name on a table. The students on the route are listed with the time of pickup/drop off and the latitude and longitude coordinates of the stop. The format of an import file from the CSV folder is depicted below.

Import CSV File Format
Student ID: The school's identification number of the student.
Latitude: The coordinates of the stop on the route measured in latitude.
Longitude: The coordinates of the stop on the route measured in longitude.
Note: The Latitude and Longitude coordinates must apply towards an existing stop in ARMOR.
Time: Local time the student is being picked up on the schedule.
Vehicle Name: Number/Name of the vehicle scheduled to travel the route.
Select a file and click Open. Click Cancel to stop the process. The imported routes are previewed in the display below. Confirm all the data is correct.

Listing of Imported Routes
Student: Name of the student on the route.
Type: Student transport is either a Dropoff or Pickup.
Arrival: Local time the student is scheduled for arrival.
Departure: Local time the student is scheduled for departure.
Latitude: The coordinates of the student's scheduled stop on the route measured in latitude.
Longitude: The coordinates of the student's scheduled stop on the route measured in longitude.
Click Import Routes to commence the importation process. Click Cancel to end the process. The trips are created for the routes on the next valid day.
If an error occurs during the import process, a message will appear defining the errors. Before importing can proceed, all of the errors must be corrected.

Errors From Import Message
Import Error Messages/Corrections:
Error Condition |
Suggested Corrective Action |
|---|---|
Internal Server Error : "An internal server error occurred while reading the file. Please contact your system administrator." |
Contact the system administrator. |
Vehicle Not Found : "The vehicle ##VEHICLE_NAME## was not found in the database." |
Make sure the vehicle name matches the name of the matching vehicle in ARMOR. |
Vehicle Not Available : "The vehicle ##VEHICLE_NAME## is already on another Route during this time." |
It will be necessary to change to another available vehicle in the Route Schedule time window. |
Student Not Found : "Row ##ROW##: Student ID ##ID## was not found in the database." |
Make sure the Student ID matches the Student entry in ARMOR. |
Student Not Available : "Row ##ROW##: Student ID ##ID## is already on another Route during this time." |
The affected Student ID either must be removed from the CSV file or from the other Route they’re currently scheduled for. |
Invalid Latitude : "Row ##ROW##: The Latitude ##LATITUDE## is invalid." |
The range for valid Latitude is between -90 and 90. |
Invalid Longitude : "Row ##ROW##: The Longitude ##LONGITUDE## is invalid." |
The range for valid Longitude is between -180 and 180. |
Invalid TimeSpan : "Row ##ROW##: The Time ##TIMESPAN## is invalid." |
The TimeSpan must be formatted as an ISO 8601 Duration with a Time component (e.g. PT6H30M represents 6:30 AM). |
TimeSpan Out Of Range : "Row ##ROW##: The Time ##TIMESPAN## is outside of the Route Schedule window." |
Change the time of the affected TimeSpan to fit within the time window of the Route Schedule. |
Student Drop Off Twice : "Row ##ROW##: Student ID ##STUDENT_ID## is getting dropped off twice." |
Confirm that the affected Student’s Lat/Lon coordinates have exactly one row inside a School geofence and exactly one row outside of the geofence. |
Student Pickup Twice : "Row ##ROW##: Student ID ##STUDENT_ID## is getting picked up twice." |
Confirm that the affected Student’s Lat/Lon coordinates have exactly one row inside a School geofence and exactly one row outside of the geofence. |
Manual Creation Type

Manual Route Creation
1.From the initial Route Group Creator window, enter the name of the new route in the Name text box.
2.From the Direction drop-down menu, select whether the route encompasses transit To School or From School.
3.The Days row has a line of buttons for each day of the week. Select the days the route will run; typically Monday through Friday. Click Next to proceed to the window with the Creation Types displayed as depicted above.
4.From Creation Type select the Manual method from the Auto, Import, and Manual options.
5.Click on the clock icon next to the Start Time and End Time drop-down boxes to set the time the new route begins and ends.
6.Click Create after the selections are complete, readying the route for the Route Group Editor window where route names and vehicles can be assigned. Click Previous to back out of the window.
Route Group Editor
Click the Edit Routes button![]() in the Actions column to open the Route Group Editor window for a corresponding group of routes (i.e., Morning Routes).
in the Actions column to open the Route Group Editor window for a corresponding group of routes (i.e., Morning Routes).
Routes for Route Groups
From the Route Group Editor window, users are able to view and edit all of the scheduling information.

Route Group Editor Window
Schedule Details
The Schedule Details displays the Routes, Name and Type of the route in addition to the Days and Time the route runs. Users can add a route and edit a Route Group.

Schedule Details
Add Route
A route can be added by selecting Add Route button ![]() to open the Add Route dialog box. Enter the Route Name and assign a vehicle for the new route from the Assign Vehicle drop-down menu.
to open the Add Route dialog box. Enter the Route Name and assign a vehicle for the new route from the Assign Vehicle drop-down menu.

Add Route Dialog Box
If the subject vehicle is not found on the list, or if the list is unpopulated, a hover-over message appears stating the vehicle must be assigned to Vehicle Groups.

Warning That Vehicles Need an Assigned Home Lot
After making the selections, click Submit. Click Cancel to stop the route addition.
Edit Route Group
Click on the Edit Route Group ![]() button to open the Edit Route Group dialog box. The Edit Schedule dialog box enables the user to edit a route schedule.
button to open the Edit Route Group dialog box. The Edit Schedule dialog box enables the user to edit a route schedule.

Edit Route Group Dialog Box
Within the dialog box the days applied to the schedule can be selected by clicking on the Days buttons. The start time and end time can be changed by clicking on the clock icon next to the Start Time and End Time entry boxes.
Note: The changes made to the Start Time and End Time settings cannot interfere with any existing stops on the route.
Click Submit to enact the changes. Click Cancel to stop the change process.
Stop Details and Student Roster
Clicking on an individual stop from the list of Routes opens the Stop Details table that lists a roster of the students who are expected to be picked up or dropped off at the stop. A map depicting the location of the stop is displayed next to the student roster.

Student Roster for a Single Stop
Student Roster At Stop
In the Actions column a button can be clicked to remove a student![]() and another
and another ![]() can be used to move a student.
can be used to move a student.
Removing a Student
Click on the Remove Student button that correlates with the name of the student to be removed. A confirmation message will appear asking to continue the process of removing the student.

Remove Student Confirmation
Click Yes to continue or No to cancel.
Moving a Student
Click on the Move Student button that correlates with the name of the student to be moved. A Move Student Dialog Box will appear asking to select the new route and stop for the student.

Move Student Dialog Box

Selecting a New Route and Stop for Student
Click Submit to make the change. Click Cancel to stop the move process.
Adding a Student
From the Student Roster at Stop dialog box, click on the Add Student ![]() button to open the Add Student to Route dialog box where a new student can be added to the stop on the route. If a student is already scheduled on the route, a warning indicating the redundancy will appear at the bottom of the dialog box.
button to open the Add Student to Route dialog box where a new student can be added to the stop on the route. If a student is already scheduled on the route, a warning indicating the redundancy will appear at the bottom of the dialog box.

Add Student to Route Dialog Box
To search for the student to add to the route, enter the student name in the text box. As the name is entered, the search for the student begins when the text box turns into a drop-down menu where the student name can be located.
The student can also be located by scrolling down the list.
Click the Add ![]() button to add the student to the text box. Multiple students can be added by clicking the Add button for each student. Click the Delete
button to add the student to the text box. Multiple students can be added by clicking the Add button for each student. Click the Delete ![]() button to remove the student from the table.
button to remove the student from the table.

Adding Student to the Route
Enter the name of the student in the first name and last name boxes. Click on the filters![]() to search for a specific name. Refer to the Sorting and Filtering section in the Introduction for information about using filters. The student can also be selected from the student listing on the dialog box. Click Submit to add the new student. Click Cancel to stop the process.
to search for a specific name. Refer to the Sorting and Filtering section in the Introduction for information about using filters. The student can also be selected from the student listing on the dialog box. Click Submit to add the new student. Click Cancel to stop the process.
Route Details
Name: The name of the route (i.e., Afternoon Route).
Deleting a Route
Click the Delete Route button ![]() to clear the selected route from the Routes table.
to clear the selected route from the Routes table.

Delete Route Confirmation Message
School Stop
From the School Stop dialog box, click on the Add Stop button![]() to open the Add Stop to Route dialog box.
to open the Add Stop to Route dialog box.

School Stop Dialog box
The Arrival can be set by clicking the time change icon ![]() that opens a drop-down menu that enables the user to make a time adjustment.
that opens a drop-down menu that enables the user to make a time adjustment.
Student Stops
From the Student Stops dialog box, the Name, Arrival Time, and Dwell Time of stops can be viewed, edited, added and deleted. Use the arrow buttons to adjust the sequence of the stops.

Changing Arrival and Dwell Times
Click the delete button![]() to clear the stop from the Student Stops table. If the delete button is gray, it indicates students are scheduled at the stop. Before deleting the stop, the students have to be removed from the stop.
to clear the stop from the Student Stops table. If the delete button is gray, it indicates students are scheduled at the stop. Before deleting the stop, the students have to be removed from the stop.
Add Stop
In the Student Stops dialog box on the Route Group Editor window, click the Add Stop ![]() button to open the Add Stop to Route dialog box where a new stop can be created or an existing stop can be added.
button to open the Add Stop to Route dialog box where a new stop can be created or an existing stop can be added.
Create New Stop

Create New Stop Tab

New Stop Created
Enter the name of the new Stop in the Stop Name: box (i.e., West Durango St.). Find the location of the Stop by entering the address in the Location: box (i.e., S. 84th Lane). A green dot displayed on the map ![]() indicates the location of the new stop. Click on the map to move the dot to a different location. Click Submit to add the new stop. Click Cancel to stop the process of adding a new stop.
indicates the location of the new stop. Click on the map to move the dot to a different location. Click Submit to add the new stop. Click Cancel to stop the process of adding a new stop.
Select Existing Stop
From the Add Stop to Route dialog box, click on the Select Existing Stop tab to open the Stop Search window. From this tab, users can search for a Stop by name by entering the name of the Stop in the Search box. Users can also select from the list of existing stops in the Available Stops column or click on the gray dots on the map. The selected dot turns from gray to green. Click Submit to add the new stop. Click Cancel to stop the process of adding a new stop.

Select Existing Stop Tab

Available Stop Selected
Radius
For Create New Stop Tab only. The Radius field allows the radius of the stop to be expanded or contracted. Drag the bar to the right to expand the area of the radius. Drag to the left to contract the area of the radius.
![]()
The default setting is 50 meters. The maximum extension of the radius is 805 meters.
After the new stop is selected, it is added to the Student Stops table. Use the arrow button to position the sequence of the stop in the route.

New Stop Added
Click the active delete button on the table to delete the stop.

Delete Stop Confirmation Message
Click Yes to continue. Click No to cancel the deletion.
Route Details Map
The map displayed on the Route Group Editor window depicts the activity that revolves around the running of the route. The green dots on the map represent each stop on the route.The red lines on the map depicts the course of the route.

Route Details Map
A green route marker![]() indicates the beginning of the route. The red route marker
indicates the beginning of the route. The red route marker![]() indicates the location where the route ends.
indicates the location where the route ends.
Time Changes
The arrival time and dwell time can be changed by clicking inside the Arrival Time or Dwell cells that enables the user to make a time adjustment. When a change is made, a red mark appears next to the changed time and a pair of buttons appear above the table. The message, "Stop times have pending changes" appears above the buttons. Click the Save Changes button to complete the time change. Click the Cancel Changes button to stop the change.

Stop Times with Pending Changes
Edit Stops Errors
If an arrival time or dwell time is changed and it overlaps another time frame of a stop, an Edit Stops Error will appear when an attempt to save the changes is made. When the View Errors ![]() button appears next to the Save Changes and Cancel Changes buttons, it indicates an Edit Stops Error exists.
button appears next to the Save Changes and Cancel Changes buttons, it indicates an Edit Stops Error exists.
Click the View Errors button to open the Edit Stops Errors message.

Edit Stops Errors Message

Dwell Time and Arrival Time Overlap Error
Auto Adjust
Click the Auto Adjust button to automatically adjust the times close to the entered settings without overlapping.
When Auto Adjust is applied, it attempts to adjust the entered time frames and arrange them to prevent overlapping between stops. The dwell time is not affected and Auto Adjust is limited in that it cannot compensate for an unrealistic time span.
Scheduled Dates
A Calendar displaying the Scheduled Dates for the selected route is on the bottom of the Route Editor window.

Scheduled Dates Calendar
Change Assigned Vehicle
A vehicle can be changed on the Scheduled Dates Calendar of the Route Details window. The replacement vehicle can't be registered to any routes during the affected route schedule time frame.
If a vehicle is on a route that has already started, a warning message will appear indicating the system will reset the route using the newly assigned vehicle.

Vehicle change when Route already started
Click the Change Assigned Vehicle button ![]() above the Route Editor calendar to open the Change Assigned Vehicle dialog box where a different vehicle to the route can be reassigned. From the drop-down calendar, the start date and end date can be selected. If the end date is going to extend to the end of the semester, click on the End of semester check box. If the vehicle change occurs at the start of the semester, click the Start of semester check box.
above the Route Editor calendar to open the Change Assigned Vehicle dialog box where a different vehicle to the route can be reassigned. From the drop-down calendar, the start date and end date can be selected. If the end date is going to extend to the end of the semester, click on the End of semester check box. If the vehicle change occurs at the start of the semester, click the Start of semester check box.

Change Assigned Vehicle Dialog Box
If any vehicles are available for the selected dates, they will appear in the Assign Vehicle: drop-down menu.
Click Submit after making the vehicle change. Click Cancel to stop the procedure.
Click ![]() from the Route Details drop-down to delete the route. A confirmation message will prompt the user to continue. Click 'Yes' to continue. Click 'No' to cancel the deletion action.
from the Route Details drop-down to delete the route. A confirmation message will prompt the user to continue. Click 'Yes' to continue. Click 'No' to cancel the deletion action.

Route Deletion Confirmation
Off Days/Delays
If there is a day where all routes are singled out from having any Student Tracking processing (i.e., a holiday), or a unique time change that applies to the routes of a selected route schedule, it can be accommodated by designating that date as an Exception Day using the Off Days/ Delays function.
An Exception Day could be a day when buses are not scheduled to run (i.e. no school on 5/17/2019).
Description: The definition of the exception and when it will occur.
Occurs: The frequency of when the exception is in effect. It can be once, daily, weekly, or monthly.
Schedule: The name of the Schedule that is affected by the exception.

Schedule Drop-down
Edit Route Exception (Type: Off Day/Time Change)
Note: Any individual route in the Edit Route Exception window can be selected, regardless of whether it's an Off Day or Time Change.
Click the Edit icon ![]() in the Actions column to open the Edit Route Exception dialog box. Click the Type drop-down and select Off Day or Time Change.
in the Actions column to open the Edit Route Exception dialog box. Click the Type drop-down and select Off Day or Time Change.
Select the first date of occurrence by clicking on the calendar.
If only one date is affected, select "Never" in the Repeat drop-down menu.
Select Daily/Weekly/Monthly if the exception should repeat.
Use the numeric input on the right to change the interval of recurrence. (Every 2 days, etc.)
For a weekly recurrence, select the days of week on which to occur. The day of week of the first occurrence is always selected. For example, selecting Monday, May 27th on the calendar causes the check box for Monday to be checked automatically.
For monthly recurrence, select one of the available options to determine the day of each month on which to occur.

Edit Route Exception Dialog Box
End:
Select the "Never" radio button to repeat until the end of the semester.
Select the "On" radio button to end on a certain date.
Select the "After" radio button to end after a certain number of occurrences.
Click Save when the edits are completed. Click Cancel to not save the selections.
Delete Exception Day
1.Click Delete ![]() to the far right of the Schedule window under the Actions column to remove the Exception Day.
to the far right of the Schedule window under the Actions column to remove the Exception Day.
2.A message will appear asking to confirm that the Exception Day will be deleted.

Delete Exception Day Confirmation
3.Click Yes to delete it. Click No to cancel deletion.
Add Route Exception (Off Day)
Click the Add Route Exception ![]() button to open the Add Route Exception dialog box. From the calendar, select the date for the Off Day. Click the Type drop-down and select Off Day. Click Save to complete the edit. Click Cancel to not save the selections.
button to open the Add Route Exception dialog box. From the calendar, select the date for the Off Day. Click the Type drop-down and select Off Day. Click Save to complete the edit. Click Cancel to not save the selections.

Add Route Exception; Off Day
Add Route Exception (Time Change)
Click the Add Route Exception ![]() button to open the Add Route Exception dialog box. From the calendar, select the date for the Time Change. In the Description box, define the exception day (i.e., holiday). Click the Type drop-down and select Time Change.
button to open the Add Route Exception dialog box. From the calendar, select the date for the Time Change. In the Description box, define the exception day (i.e., holiday). Click the Type drop-down and select Time Change.
From the Schedule drop-down, select the route where the Time Change will occur on a day entered by the user (Morning, early afternoon route, late afternoon route, or all schedules).
From the Route drop-down, select which route will be subject to the exception.
If the exception involves a time change, move the arrow keys up or down under Time Change to select the number of hours and minutes of the time change. Click on the Early or Late button to choose if the amount of time is early or late on schedule.
Under the Repeat drop-down, select the frequency of the time change exception; Never, Daily, Weekly, or Monthly. To select the days of the week the exception repeats.

Add Route Exception; Time Change
Click Save after making the selections. Click Cancel to not save the selections.